Showing posts with label Vegan. Show all posts

Wednesday, November 19, 2014

Worcestershire-Glazed Brussels Sprouts

The process of making this dish brought to mind the phrase mon petit chou. It's a French term of endearment, and while the official definition declares that chou refers to a sweet pastry, I rather like the alternate translation,  'my little cabbage.' Let's agree that pastries may be universally beloved, whereas showing affection for a cabbage requires a greater commitment to the item in question. Either way, in the absence of my own chou whose size I can evaluate, I've gone ahead and made a whole bowlful of miniatures cabbages, to snack on, savor, and share. Fall has dumped its flavors into the produce troughs so I may wander through the grocery store and weigh down my arms with mole-ridden squash, half-piece pecans, and satchels of Brussels sprouts. The sprouts shed their leaves along the conveyor belt, as they're scrubbed clean, even as they lie on the cutting board. Despite the stray leaves, I (and you) will still be left with more than enough to make a pot-ful of tangy, pleasingly toothsome, very little, vegetables. 

Worcestershire has this lovely smokey-sweet quality that cloaks the sprouts, inviting their ruffles to soak up the sauce. It's a satisfying bite. Add a hit of dried basil, summer's vestiges, and you've got a dish that delivers the warmth just right for a cozy winter night and a memory of those sun-hazy days. 

Worcestershire-Glazed Brussels Sprouts

Ingredients:
1 lb. Brussels sprouts
2 TBSP olive oil
1 tsp. garlic powder (or four cloves of garlic, peeled and sliced)
1 TBSP worcestershire sauce (I used the vegetarian kind)
several pinches of dried basil

Directions:
--Halve Brussels sprouts. In a medium saucespan, heat olive oil. Add Brussels sprouts and garlic powder or garlic and sautee for 5 minutes or until leaves begin to wilt.
--Pour worcestershire sauce to the pan and continue cooking until the brussels sprouts are fork-tender. Add water by the tablespoon as necessary to help them cook. Remove from heat and sprinkle on basil just before serving.


Wednesday, August 13, 2014

Roasted Rhubarb-Ginger Crisp


The switch from avoiding to loving rhubarb occurred just about a year ago, and to commemorate, I thought I'd explore the origins of my dislike for the stalks. It remains a bit of a mystery to me. There are no stories of undercooked rhubarb trauma. No tales of being force fed rhubarb mush. I don't even recall that it appeared too often in my own kitchen. Here's what I do recall.

When I was little, we frequently attended multi-family potlucks, where a rotating host provided the runner table and a vast backyard for little ones to explore and even littler ones to run after them, always a few steps too slow to be welcomed to the game. One after another, people emerged from their station wagons and minivans, in twos and threes, tree-trunk and spindly arms alike wrapped around earthenware full of broccoli and rice, vegetable terrines, stewed eggplant. The desserts usually arrived in pie dishes (or perhaps these I most often gravitated toward). The seasons largely dictated the offerings: squash and apple in autumn, berries and rhubarb in summer. And in those warm, August gatherings, there would sit a pie whose lattice crust, embroidered in sugar, bound a bright red filling. I'd eye it, and nudge my mother (or another nearby trusted adult). 

"What kind of pie is that?"

And if, "strawberry rhubarb," was the answer, I hastily moved on. Some vague, visceral premonition of stringy, tart mouthfuls turned me away. A second serving of blueberry would suffice.

Now, of course, I realize I very likely missed some incredible pies. Having made and tasted rhubarb in a number of forms (most recently, in risotto and on crostini), I find the flavor impeccable, and declare my past dislike a phantom revulsion. My pleasure in downing this particular creation is a case in point. 

Rhubarb outdoes itself when roasted. After a half hour of soaking up sugar and ginger, the fruit takes a slow bake in a hot oven, breaking down and absorbing the sugar—to the point where the fruit becomes velvety soft without losing its tart essence. This recipe was originally a tart, but I'll be utterly honest here: I didn't feel like making pie crust. It has its place and time, no doubt, but this afternoon I was wanting for something simple and easy—and between the deep flavors of the rhubarb roast and the snappy spiced crunch of the topping, I figured I had enough for a dessert without the hassle.
Roasted Rhubarb-Ginger Crisp (adapted from Fine Cooking's Roasted Rhubarb and Ginger Streusel Tart)

Ingredients:
1-1/2 lb. rhubarb, ends cut off and sliced into 2-inch pieces (I used two bunches of rhubarb)
3/4 cup granulated sugar
1/4 tsp. salt
1/2 tsp. ground ginger, divided
1/2 cup rolled oats (not instant)
1/2 cup unbleached all-purpose flour
2 TBSP granulated sugar
1 TBSP light brown sugar
1/4 tsp. salt
4 TBSP unsalted butter, room temperature or melted (use shortening to make vegan)
1 1/2 TBSP finely chopped crystallized ginger

Directions
--Toss rhubarb with sugar, salt, and 1/4 tsp. ginger. Let sit 30 minutes, stirring occasionally. Preheat oven to 400 degrees F. Pour rhubarb into a 9x13-inch baking pan, cover with foil, and roast for 10 minutes. Remove the foil, give the rhubarb a stir, and return it to oven for 15 minutes more. A bubbling syrup should form by this time. Take the rhubarb out of the oven and scoop into an 8- or 9-inch pie pan with a slotted spoon. Discard the syrup that's left or reserve to use as an ice cream topping.
--Reduce oven temperature to 350 degrees F.
--In a medium bowl, mix together all other ingredients. If using room temperature butter, cut into pea-sized pieces with a pastry cutter, knives, or your fingers.
--Sprinkle topping over the rhubarb Bake 35 minutes, or until the rhubarb is bubbling and topping is golden brown. 


Saturday, May 17, 2014

Pecan Macaroons


Not too long ago, I received the challenge to create a cookie sampler for an end-of-semester celebration, so this is the first in a two-part series covering the chosen types. I wanted some variety, so I did a frosted chocolate cookie and these macaroons. This cookie, the pecan macaroon, is reminiscent of German Chocolate Cake filling. The pecans and coconut are bound together by a gooey honey and vanilla mixture—a little time in the fridge condenses them into sturdy little confections. Pass them around and watch them disappear.

This recipe, I was pleased to discover half way though the cooking process, meets the requirements for gluten-free and vegan baking (and, well, no-bake baking, actually). I've dabbled in vegan baking before, with mixed results, but I'm not one to seek out recipes specifically for their gluten-free properties. So it's a delight to have one on hand. The macaroons are even Passover-friendly. All of which is to say, make them for any occasion you like.
Pecan Macaroons
Ingredients:
2 cups shredded, sweetened coconut
1 cup pecan meal
2/3 cup honey (or agave or maple syrup)
1/4 cup vegetable oil
1 TBSP vanilla extract
1/4 tsp. salt
extra 1/3 cup shredded coconut for coating

Directions
--Mix together all ingredients. Set out a cookie sheet and clear space for it in the fridge. Use hands to form the dough into balls, using about 2 TBSP dough per macaroon. Roll in extra coconut and place on the cookie sheet. Dough will be very sticky.
--Refrigerate at least 2 hours before serving. Makes 24 medium-sized macaroons.

Wednesday, March 12, 2014

Morning Scones with Apple and Oats

Several weekend mornings  (and the occasional weekday evening) this past year, I’ve woken up (or returned home) to the sprightly sizzle of pancake batter puffing up on the skillet. As a kid my family frequently made weekend breakfasts, consisting of blintz, hash browns, or blueberry pancakes. If it were blintz, I’d help mix the cottage cheese filling—if pancakes, I’d get to drop the blueberries into the just-overturned cakes. (Hashbrowns I left alone—they included onions, which in my youth I deemed slimy and too bold of flavor.) Sometimes I sat and watched the breakfast construction. Sometimes I clambered onto a stool precisely as one of my parents slid a laden plate and already-dripping syrup spout toward me.  Either way, to have this lazy weekend morning serenade of breakfast resume, now courtesy of my roommate, is rather a treat. And this past weekend, I thought I’d take up the task of putting together the breakfast. In lieu of something that requires immediate consumption, I decided to make morning scones.I’ve had mixed success with scones in the past, but this apple-oat rendition is one of the better ones I’ve come across. There's just enough butter to form a tender crumb, and the oats give some toothiness, while the apple chunks make for bursts of smooth, sweet flavor. I didn’t have buttermilk around, so I created sour milk with soy milk and a dash of vinegar to give the scones just the lift they needed.
Adapted from Martha Stewart's Apple and Oat Scones
Morning Scones with Apple and Oats
Ingredients:
1 2/3 cups unbleached, all-purpose flour
1 1/3 cups rolled oats
¼ cup plus 2 TBSP brown sugar
½ tsp. ground cinnamon
½ tsp. ground nutmeg
2 tsp. baking powder
¾ tsp. baking soda
½ tsp. salt
½ cup (1 stick) cold butter, diced (use margarine if making vegan)
1 ½ cups chopped apple (I used one large gala)
2/3 cup buttermilk or sour milk

Directions:
--Preheat oven to 400 degrees F. Mix together flour, oats, brown sugar, spices, baking powder, baking soda, and salt. Cut in butter with two knives or a pastry blender until it’s in pea-sized pieces. Add apples and buttermilk and stir with a spoon until incorporated. Use hands to press dough into a disk.
--Flour a cutting board. Flatten dough into a rectangle, about 6 by 8 inches. Use a sharp knife to cut into 12 triangles. Place on two ungreased cookie sheets, making sure the scones don’t touch.
--Bake scones for 18-20 minutes, or until tops are golden brown. 


Wednesday, January 29, 2014

Chocolate Cake


Sometimes, a good chocolate cake is what's needed. And that's precisely what I've got here. It's a simple recipe that achieves a simple goal—putting chocolate cake in your kitchen. This may very well be a cake you've seen, and hopefully tasted, before, but it bears repeating, re-making, and rejoicing. For it is just that good. And it's a handy recipe to have in your back pocket, or recipe chest, or bookmarked, or whatever method you use to log in-a-pinch recipes.
The cake's simplicity comes from its oil base and substitution of vinegar and baking soda, in place of eggs. It's a one bowl deal, and it also happens to be vegan. The frosting, which is not at all vegan, does add a couple extra steps. It wants for a double boiler, creating more dishes than one might prefer, but you can find your own frosting of choice or even skip it altogether. It's the cake part of this cake that reigns supremely chocolate. 
From Moosewood's Six-Minute Chocolate Cake
Chocolate Layer Cake
Ingredients:
3 cups unbleached, all-purpose flour
2/3 cup unsweetened cocoa powder
2 tsp. baking soda
1 tsp. salt
2 cups granulated sugar
1 cup vegetable oil
2 cups cold coffee
4 tsp. vanilla extract
4 TBSP cider vinegar

Directions:
--Grease and flour two 9-inch round or 8-inch squash cake pans. Preheat oven to 375 degrees F.
--In a large bowl, whisk together flour, cocoa, baking soda, salt and sugar. Add in the oil, coffee and vanilla together and stir to combine. Stir in the vinegar just until combined: a few pale streaks from the vinegar may remain.
--Pour batter into pans, distributing as equally between the two as possible. Bake for 25 to 30 minutes or until a knife inserted in the center comes out clean. Let cool 15 minutes before removing from pans.

Chocolate Glaze
Ingredients:
1/2 lb. semi-sweet chocolate
3/4 cup milk
1/2 tsp. vanilla extract

Directions
--Melt chocolate in a double boiler or microwave, taking care not to burn if using the latter. Stir in milk and vanilla until smooth. Let cool slightly.
--To assemble cake, carefully invert one layer onto a serving plate. Pour half the glaze on top, smoothing with a spatula to the edges of the cake. Place the second layer on top and pour on the rest of the glaze, letting it run down the sides. Cool completely before serving.

Saturday, January 11, 2014

Citrus-Beet-Cabbage Slaw

Perhaps slaw seems an odd recipe to recommend during winter; the refreshing ribbons bring to mind a summer picnic-table spread, one hand on a paper plate that bends alarmingly under its potluck selections and the other on a jug of lemonade, feet decorated with grass stain tattoos. That's not at all the case here. When I made it this past week, the bowlful took its spot on an elegantly laid table, bringing a group of neighbors in from the bitter cold to tuck into platefuls of risotto (unfortunately un-photogenic, although you can find the recipe here). It proved a good pairing with the soft, creamy rice-and-squash. And so I'd argue that this slaw, with the lemon and orange dispensing tropical allusions, fits any season and any table, whether accompanying a barbecue spread or a hot dish.

This dish is in fact a mash-up of two slaw recipes: I must have been running on purple, as I combined purple cabbage with beets, marinating the two in an orange-lemon vinaigrette for a couple hours. I've never eaten raw beets before, but here they're grated thinly enough that what begins as a tough, bulbous root calms down into acidic shreds of rich red goodness. Red cabbage is rarely a go-to for me, but here it takes up the zesty flavor of the citrus, giving a bite of crunch that's not harsh or earthy, but deliciously tart.


Adapted from Fine Cooking's Citrusy Beet, Parsnip, and Radish Slaw 

Citrus-Beet-Cabbage Slaw
Ingredients:
1 orange
1 lemon
1 tsp. honey
2 TBSP olive oil
salt and pepper
3 medium beets, peeled and shredded
1/2 red cabbage, thinly sliced

Directions:
--Zest orange and lemon. Juice both citruses and whisk together zest, juice, honey and oil. Add salt and pepper to taste. Add beets and cabbage and stir to coat with the vinaigrette. Let sit at least two hours before serving.


Saturday, November 9, 2013

Baked Squash Fries with Lemon


Squash is not for the hungry. That is, it is best to prepare squash the day before you plan to eat it. Time and again I've made the mistake of returning home with a craving for a creamy orange slice, only to find myself with an hour and a half of desperate slicing, scooping, and baking standing between me and a full plate. Therefore, as of late, my mode of operation has been to always have cooked squash around the house (and even around the officea tupperware full of the baked stuff stashed in the communal fridge, it turns out, provides an excellent antidote to the mid-afternoon munchies). I've been operating under the assumption that I will always want roasted squash when I get home,  which turns out to be pretty accurate.

This recipe put me in the path of two hitherto unused types of squash: carnival and delicata. While I remain most attached to the buttercup, they performed quite well as (baked) fries, soaking up the tangy lemon juice and roasting into a velvety soft texture. I kept the skin on, as I generally do with squash: it makes for a bold mixture of colors, and I like the variety of texture it imparts. Even in the slim fry form, they spent a good forty minutes in the oven, keeping the house warm and squash-flavored. The fries would benefit from just about any spice or flavoring you throw at thembalsamic and basil come to mind. But I'm very fond of the clean, fresh lemon.
Baked Squash Fries with Lemon
Ingredients:
2 medium squash (I used a delicata and a carnival, but one butternut or two acorn could be substituted)
zest and juice from 1/2 lemon
1/2 tsp. salt
1 tsp. pepper

Directions:
--Preheat oven to 400 degrees F. Lightly grease a large glass baking dish.
--Scrub squash skin with water (skip if you're skinning the squash before baking). Half squash and scoop out seeds. If desired, slice off skin. Cut squash into skinny strips, making as uniform as possible.
--Add squash to pan. Pour lemon juice and zest over squash and toss to coat. Sprinkle with salt and pepper. Bake for 40 minutes, stirring squash at 15-minute intervals to ensure even roasting. Remove when squash begins to caramelize on the outside, but is soft when pierced with a fork.

Sunday, October 27, 2013

Crusty Whole Wheat Bread

This bread is an incarnation of the popular recipe for 'artisan bread anytime.' And by common standards, it is quite simple. Nearly every ingredient is a multiple of two. There's no need to heat the water or proof the yeast. Even the kneading's a short term deal. Chill the dough, and when you're ready to bake, it goes straight from fridge to oven. The steps are so straightfoward, there's barely an opportunity to make a mistake. As it turns out, however, I managed to find one method of messing up the recipe, and in doing so, made a rather unfortunate oversight.

I did not read the entirety of the recipe before commencing to bake this bread. The recipe itself I received word-of-mouth a month or so ago, and by the time I got around to testing it out, a few details escaped me. So I looked about the internet to fill in the gaps, and the blog I found suggested creating steam to achieve a true tooth-tugging crust. Sounded like a pretty good idea. But I skimmed over the recipe's crucial pointer not to use a glass pan for the steaming vessel. I popped this exact sort of pan into the oven while it preheated. Once up to temperature, I poured in some lukewarm water and in return heard a prompt pop as the pan shattered.
The oven is, at least, much cleaner now And after picking up the pieces and scrubbing both floor and oven innards, I made one dense, hefty, crusty loaf of whole wheat bread. I baked it on a plain cookie sheet, no frills, and a thick crust developed without any sort of steam bath at all. So what I'd like to present you with is an honestly easy recipe. It's a one-bowl affair, kneading can go for as little or long as you like, and after an overnight visit to the fridge, whatever shape you end up with can be plopped down onto a sheet pan and baked into an hearty boule that welcomes butter, cheese, peanut butter, or any combination thereof.
Crusty Whole Wheat Bread
Ingredients:
4 cups flour (any combination of all-purpose and whole wheat works: I used 1 1/2 cups unbleached, all-purpose flour and 2 1/2 cups whole wheat flour. A loaf used half of each)
1 1/4 tsp. yeast
2 cups water, room temperature
2 tsp. salt

Directions: 
--Mix together flours and yeast. Add water and salt, and stir with a spoon until a dough begins to form. Knead with your hands 10 minutes (or as long as you'd like, really).
--Put dough in a clean bowl, cover, and refrigerate overnight or up to 18 hours. When ready to bake, remove from the fridge while the oven preheats.
--Preheat oven to 450 degrees F. Form dough into an oval or round and set on a cookie sheet. Using a serrated knife, slash several 1/2-inch grooves onto its top.
--Bake for 35 minutes. Lower oven temperature to 350 degrees, and bake an additional 10 minutes, or until bread's bottom sounds hollow when tapped. Let cool at least 5 minutes before eating.

Tuesday, June 18, 2013

Three-Seed Flatbread


The poppy seeds will get stuck in your teeth. It's no use trying to hide this fact. If you've got good fortune, they'll keep to the back molars. If not, you may give your dining companions the awkward experience of choosing between informing you you've got seeds in your teeth or pretending they don't notice, leaving you to discover once everyone's gone that you've spent the entire night sporting a large seed front and center. Either way, you'll likely find the poppy seeds lingering beyond the last bite. But good grief, it is well worth it: for this is excellent bread.


Sunday, June 9, 2013

Deep Dish Blueberry Pie


Above all desserts, blueberry pie stands alone. And I have a few ideas why this pie is affixed with such high honors in my mind. It might be the memories of picking blueberries on Boxing Day in Australia, where we would join our friends to list the previous day’s bounty of presents as we dislodged showers of berries from the bushes. It might be watching my mother riffle through the small wooden recipe chest to pick out the creased recipe for the oil pie crust. It might be Violet Beauregarde's final triumphant chew of blueberry pie gum, before she begins to exhibit the blueberry's qualities herself. It might be testing bites of uncooked pie filling and savoring the gritty granules of sugar that coated the blueberries. It might be reading Weekend at Muskrat Lake, the story of two sisters who forage for berries, only one of whom will return with enough in her bucket for a batch of muffins.

Tuesday, May 7, 2013

Tempeh, marinated with Balsamic and Rosemary

I recall returning home for a mid-college visit last year, and in a pre-flight conversation with my family, I made one request. I asked that my mom make fried tempeh during my visit. She had introduced the food to me in this way, serving it as a side dish of small cubes, lightly fried for a clean flavor. I landed in Louisville late that evening, and both parents picked me up. A tupperware of tempeh was waiting in the car. I ate it all.

Saturday, April 20, 2013

Swiss Chard Pesto

Pesto really reminds me of summer. It's the season for harvesting basil, of course, but it is the bright flavour that puts me to mind of a fresh, sunny time of year. A time of year where the family gathers on the porch for dinner, and the whole pot of pasta sits at the table's center, so that no one has to reach far for seconds. In this sense, this recipe is of two minds. It is a pesto, which suggests a cry on my part for a glimpse of warm, picnic-friendly weather. But the leaf is not basil, but Swiss chard, signaling that we still have a ways to go before basil's reign is upon us. It is not actually chard season either. But I, at least, don't have the same association with the green as I do with basil, so I'm spared the nostalgia.

In its own right, this is very pretty pesto; the chard's red stems fade to a blush pink during the simmer, giving a vivid contrast of colors to the pesto's final form. I used the pesto in a couple different ways: a scoopful mixed with brown rice tinged the grains pink. A second night, I used it as a spread and smothered a toasted bagel with the pesto. The oil from the pesto acts almost like butter, soaking into the bagel's crispy pores, but with the added flavor of the luscious greens. Pairing with pasta is a natural crowd-pleaser as well.


Adapted from Shutterbean's Kale Walnut Pesto
Swiss Chard Pesto
Ingredients:
1/2 bunch Swiss chard
4 cloves garlic, chopped in half
2 TBSP lemon juice
2 TBSP olive oil
salt and ground black pepper

Directions:
--Rip chard leaves off of stems; don't worry about the size. Chop stems into 1-inch pieces.
--Place chard stems and leaves and garlic in a small pot and cover with water. Heat on medium-high heat and cook 8-10 minutes, or until leaves are wilted and stems are easily pierced with a fork. Drain water, and when cool, squeeze excess moisture from leaves.
--Scoop chard, garlic, and lemon juice into a blender. Blend on low-medium speed, adding oil gradually, until almost smooth and pesto looks just slightly grainy. Add salt and pepper to taste. Stir into rice, pasta, or polenta, or spread onto a bagel or piece of toast. Would also be excellent on grilled cheese.

Saturday, March 16, 2013

Green Salad with Peppery Carrot Pennies

This recipe does not remotely resemble any Irish dish that I know of; nonetheless, I am claiming it as my contribution to the flurry of St. Patrick's Day-themed memorabilia and festivities. The recipe does, in my defense, contain two colours from the Irish flag. And carrot soup is common in Ireland. And the salad looks very green. So there you have a couple connective strands. But enough with the hemming and hawing- what's important here is that this is really quite delicious. It's also pretty hands-off. The only hard part is waiting for the carrots to cook.
Only now do I realize that I could have really elevated the dish (and completed the trifecta of Ireland's flag colours) by speckling the salad with rustic chunks of white Dubliner cheese. It's a favorite of my family's. I'm including the cheese in the recipe list, so that hopefully you will add it to your salad. I, alas, will have to wait until next time. But cheese or no cheese, the carrot pennies cooked down beautifully in about forty minutes. They are simple to prepare. I just gave them a quick slip-and-slide through the oil coating the pan. But it's the black pepper that I love--several good shakes of the biting specks brighten up the dish and act as a foil to the sweet carrot and the tangy dressing.

Serves 1.
Green Salad with Peppery Carrot Pennies
Ingredients:
2 carrots, scrubbed clean
1 TBSP olive oil
1/4 tsp. salt
1 tsp. pepper
one large handful lettuce leaves (I used oak leaf lettuce, I believe)
salad dressing of choice (I used bottled red wine vinaigrette)
white cheddar or other sharp cheese, crumbled into small pieces (optional, but highly recommended)

Directions:
--Heat oven to 475 degrees F. Cut carrots into rounds, about 1/2 an inch wide. Take a 9-inch round or square pan and coat with oil. Add carrots to pan and sprinkle with salt and pepper. Spread carrots across pan, turning over to coat both sides with the oil, salt, and pepper. Roast for 40 minutes or until outsides have crisped and a knife easily pokes through the pennies.
--Wash lettuce and place in a bowl or on a plate. Toss with 1-2 TBSP dressing. Top the salad with the roasted pennies. Add cheese if desired.

Sunday, February 24, 2013

Basil & Cannellini Falafel with Spinach-Tahini Stuffed Pita

I readily eat bread heels. Crusty bread heels especially: it's fun to scoop out the insides and then fill the cavity with tomato sauce, or hummus, or cheese. With regular bread, I'd rather eat the middle slices, as most people do. But even then I've been known to take the end of the loaf and munch away. I just can't bear the alternative of sending them to the compost. But on the whole, these piece are preferable, and infinitely adaptable, in the form of breadcrumbs. My bread heels add to the fluctuating contents of a ziploc bag I keep in the freezer until I time to grind them down. Once ground, they are ready to crown a baked pasta or, as below, become falafel.

Falafel are, in my experience, very messy. Despite the presence of a chewy pita to keep the patties and their accoutrements contained, I cannot tidily eat falafel. Untouched, the falafel has a crisp shell. But once bitten into, the soft innards land in crumbs all over the place. And unfortunately, this recipe does nothing to rectify this problem. If anything, mine are messier. I've pan fried them, and the exterior that forms is fairly soft, although still nicely browned. I have no tips for eating, except- enjoy. And maybe use a bowl.
What I've done here is replace the chickpeas with cannellini beans and the parsley with dried basil. I admit this substitution arose from another case of use-what's-in-the-pantry, rather than an deliberate burst of creativity. But there's a reason these beans were in the cupboard in the first place. While I like chickpeas, I'm not fond of their oddly slippery skins. I much prefer the rich, smooth texture of the cannellini bean. I did leave in elements of the traditional falafel, with sprinkles of cumin and coriander. The mix creates a bite of warm, homey flavours. And the recipe is terribly healthy, so stack your plate (they are fun to stack). I cooked mine in a lightly greased pan; the patties also respond well to baking or a quick fry in hot olive oil, for more crispiness.
What you do with the falafel is up to you. Eating them with a simple condiment like hummus or pesto would make a tasty meal. But they were wonderful with these spinach-filled pita. I stuffed a pita (homemade, and you can too) with tahini-laced spinach and some slices of bright, plump tomato. The falafel should really go in the sandwich too, but my pita refused to carry more than the spinach and tomatoes. Store-bought, I'm guessing, are more generous.

Adapted from Fine Cooking's Falafel Sandwich
Basil & Cannellini Falafel
1 15-oz. can cannellini beans, rinsed and drained
2 TBSP olive oil
1 tsp. ground cumin
1/2 tsp. ground coriander
2 TBSP dried basil 
1/2 cup breadcrumbs* 
Salt and ground black pepper

Directions: 
 --To a blender, add the beans, oil, spices, and basil. Blend until coarsely ground. Dump blender contents into a bowl and mix in breadcrumbs. Add salt and pepper to taste.**
--Spray a medium saucepan with nonstick cooking spray and heat on medium-high. Using a large spoon, form mixture into patties about 1 1/2 inches wide.
--Add shaped patties to the pan and cook 2 minutes on each side, or until lightly browned. With a spatula, remove from the pan and place on a plate to cool. Makes approximately 9 falafel.

For the Spinach-Tahini Pita (serves 1)
Ingredients:
2 TBSP tahini
1/4 cup wilted spinach (frozen or fresh that's been cooked in water and drained)
1/2 small tomato, sliced
1 pita, halved
optional: extra tahini

Directions:
--Toast pita or warm in a 250 degrees F oven for the time it takes the spinach to cook. Spoon tahini into a small saucepan and heat over medium-low. Add spinach and cook two to three minutes, until spinach is thawed (if frozen) or until tahini and spinach are well combined.
--Remove pan from the heat, and place tomatoes and spinach mixture inside the pita. If desired, drizzle extra tahini in pita and over the falafel.

*To make breadcrumbs, tear frozen or fresh bread into roughly one or two-inch squares. Using a blender or food processor, grind into crumbs. Store-bought breadcrumbs such as Panko would work fine as well.
**At this point you can freeze the mixture. Before cooking the falafel, let thaw for at least half an hour. I have also successfully frozen the cooked patties. To reheat, bake in a 250 degrees F oven for five minutes. 

Sunday, January 27, 2013

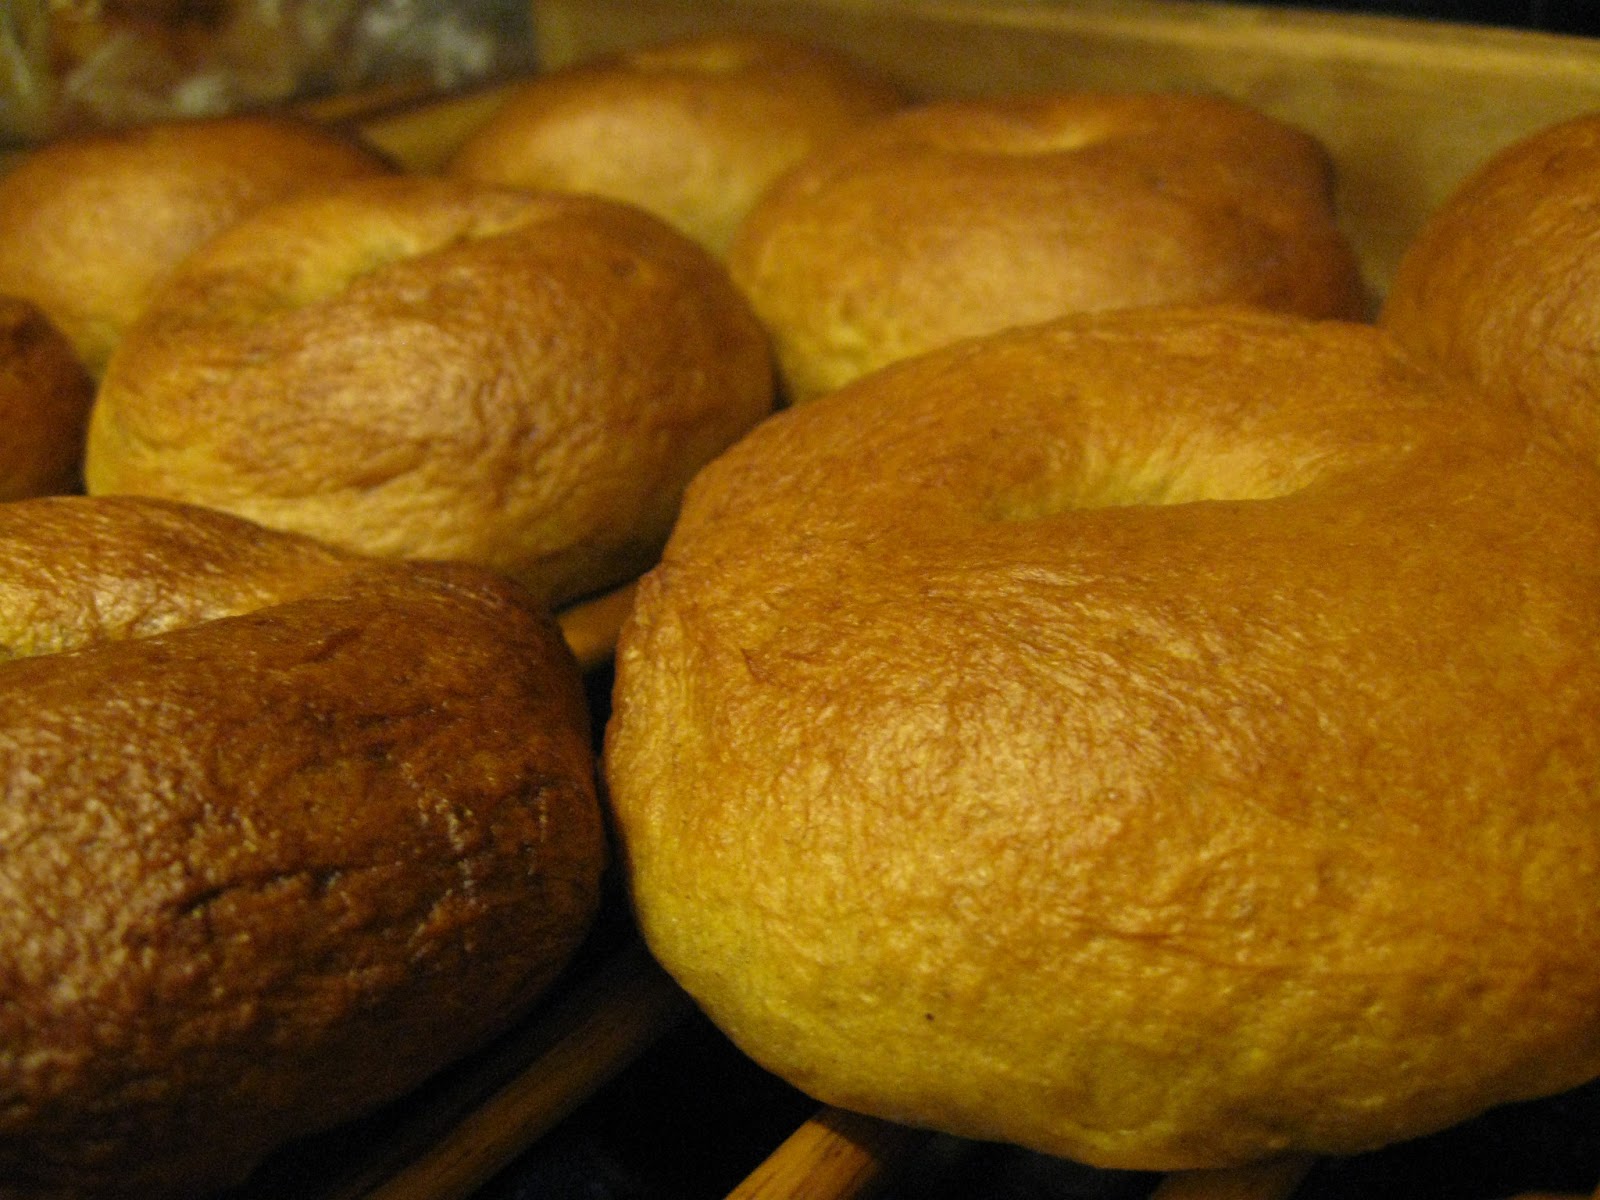
Pumpkin Bagels

I have never had a New York bagel. New Jersey bagels, yes. This past summer, we were driving home from our holiday on Martha's Vineyard, and we stopped at a New Jersey exit to fill the car with gas and ourselves with coffee. It was there that we spotted a sign for bagels. My family takes bagels very seriously, so we carefully nudged the car (sailboat in tow) into the tiny parking lot and all but bought the deli out. After a slightly stressful extraction of the car from the parking lot, just managing to avoid both parked and moving cars, we continued on our way. I ate my salt bagel whole and plain, and it was delicious.
This spoon knows bread better than anyone I know
So I haven't had a New York bagel, but I've had one from New Jersey, and from Brueggers, and from Dooley's. And possibly the tastiest Everything Bagel at Please & Thank You, although I'm not quite sure if they make theirs in house or not. But the bagels I've eaten most come from my mother's kitchen. My mother regularly makes bagels, and these too I often eat plain, or with a thick slice of sharp cheddar. Her go-to flavours are citrus-and-cranberry, or poppy and sesame seed. But over the holidays, I suggested we make pumpkin bagels, and she readily agreed.
 These bagels were a complete collaboration, I peeking over my mom's shoulder as she boiled the bagels, the two of us poking holes into the plump, springy dough. The recipe is utterly hers; all I supplied was the suggestion to use leftover pumpkin. And it's a good recipe for two to tackle: one person to chase the bagels around the molasses-tinted water while the other finishes shaping the dough. I suppose, in other words, the recipe is a bit complex. But it's terrific for a low-key afternoon that invites you into the kitchen.
This recipe is my mother's classic bagel recipe; we just added pureed pumpkin and a bit of spice
or, rather, a few bits of spice. Cinnamon, allspice, ginger and cardamom. If you fancied, you could add or remove any flavouring you'd like. The result is a chewy, dense bagel that can lend itself to sweet or savory. The general consensus is that butter goes best, but the bagel really is your canvas.

Pumpkin Bagels
Ingredients:
2 1/2 cups water
1 package active dry yeast
1 TBSP molasses, honey, barley malt, or granulated sugar
1/2 cup gluten (optional: it does add extra chewiness, but the bagels will still be beautiful and tasty without it)
4 1/2 cups white bread flour or unbleached all-purpose flour
2 tsp. salt
1 cup pureed pumpkin, canned or homemade
1 tsp. cinnamon
1 tsp. ginger
1/2 tsp. allspice
1/2 tsp. cardamom

Directions:
--In a small saucepan, heat water to wrist temperature. Put yeast and molasses (or other sweetener) into a bowl and pour warm water over. Let sit until yeast is proofed, about ten minutes.
--Combine gluten, flour and salt in a large bowl. Add yeast mixture, pumpkin and spices. Stir with a wooden spoon until dough begins to form. Using hands, knead until smooth, adding more flour if necessary. Cover bowl with a towel and let rise in a warm place until doubled, 1 1/2-2 hours.
--Heat a large pot of water mixed with 1/3 cup molasses or barley malt to a boil. While water is heating, divide dough into 8-12 balls. Let rest 10 minutes, then shape into bagels by poking holes into the middle of the balls.
--Preheat oven to 425 degrees F. Add bagels to water 3-4 at a time and boil for 1 minute on each side, using a spatula to turn over. Transfer to a baking sheet lined with parchment. Bake for 35-40 minutes, or until bagels sound hollow when tapped. Remove from oven and let cool on a rack. Eating while warm is advised.