Showing posts with label Bread. Show all posts

Monday, September 7, 2015

Millet-Whole Wheat Bread


Here's some any day bread for you. I say any day bread because it absorbs interruptions, forgetfulness, and haste alike, using whatever time you have (or don't have) to rise into a toothsome, earthy loaf. I've left the dough to rise overnight in the fridge one day and given it just a couple hours on the counter on another: each time has resulted in an absolutely chewy, hearty, peanut butter-friendly loaf of bread. The millet's texture gives bite while the sweet molasses takes the edge off what might otherwise turn into an overly wheat-y flavor.

I initially chose this recipe as a means for ridding myself of a half-bag of millet, past experiments  having produced a bland mass (excluding this casserole, where it performed rather well). Now I've got my favorite bread recipe du jour--a bundle of dough is in the freezer right now, waiting for me to finish up a bag of bagels.
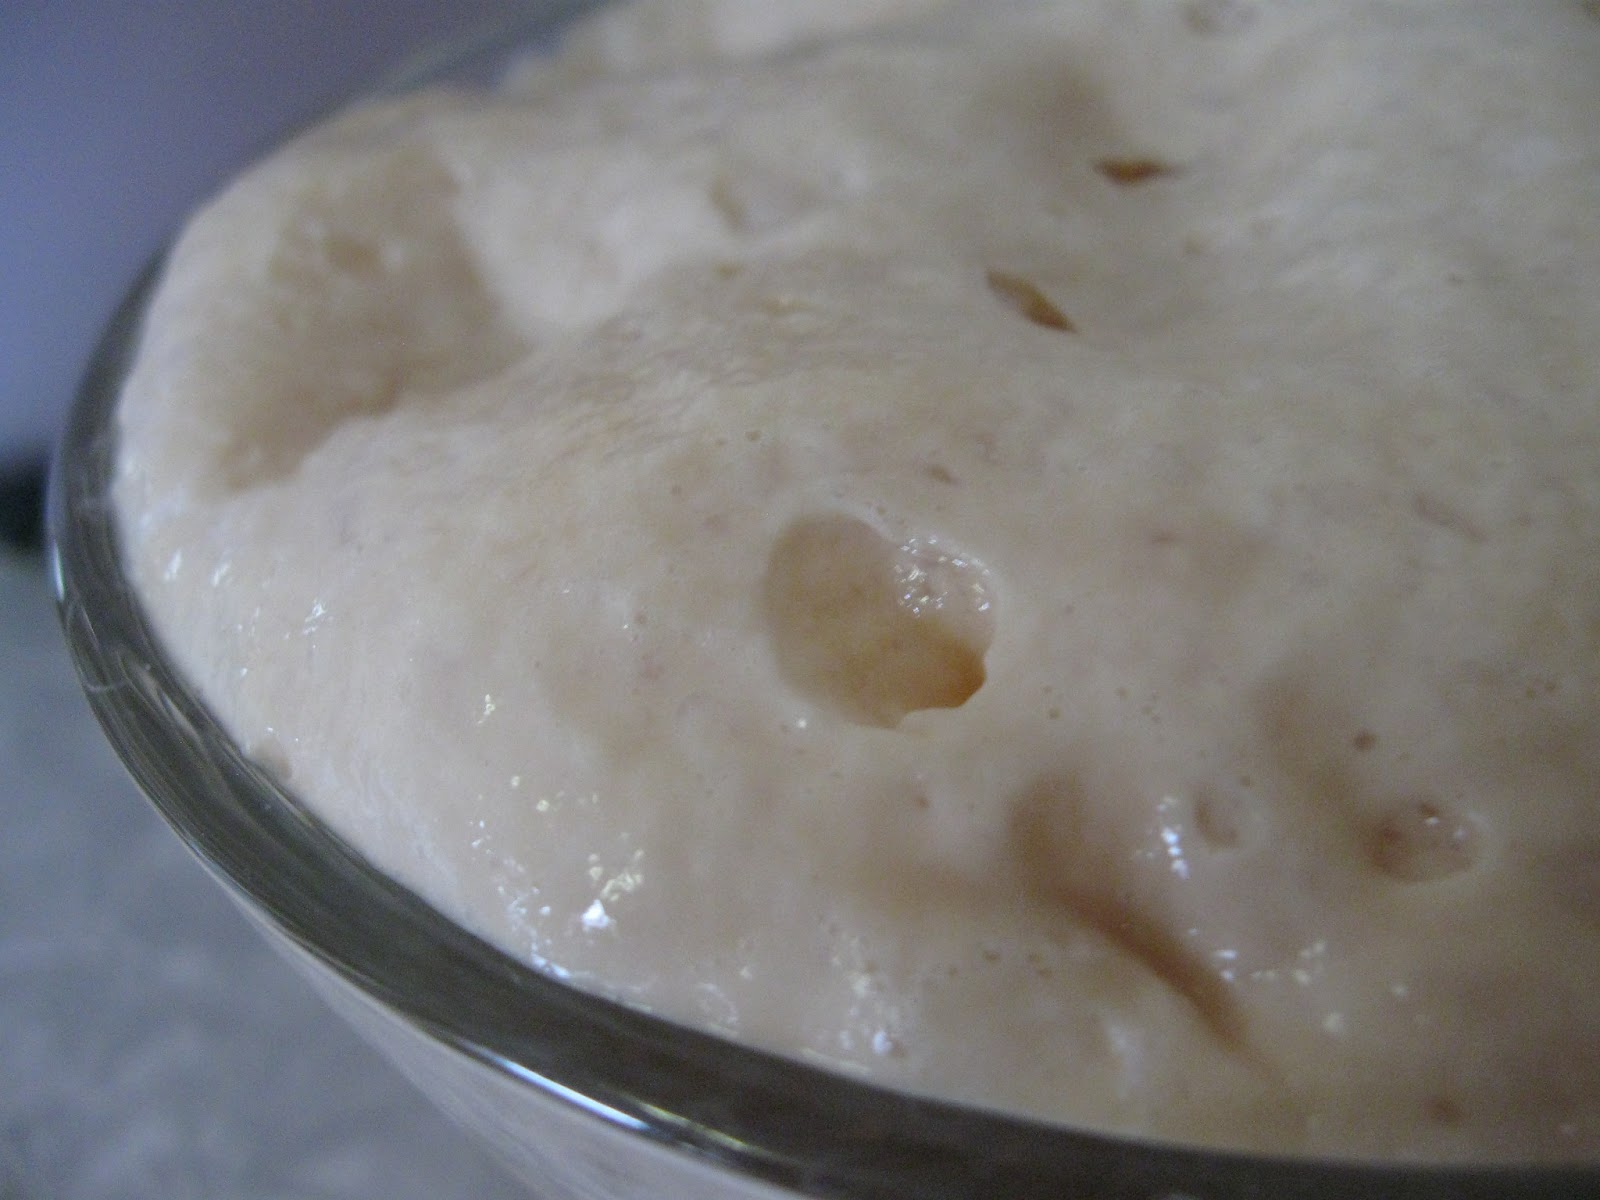
Yeast doing its thing.
Adapted from the recipe Molasses Bread with Cooked Grains in Vegetarian Cooking for Everyone by Deborah Madison. I usually make a half-recipe.

Millet-Whole Wheat Bread
Ingredients:
2 1/4 cups water
2 1/4 tsp. (1 package) active dry yeast
1/2 tsp. sugar
1/4 cup molasses
3 TBSP vegetable oil
2 1/2 tsp. salt
1 1/2 cups cooked millet
2 cups unbleached, all-purpose flour
3-4 cups whole wheat flour

Directions
--Heat 1/4 cup of the water to wrist temperature. Pour into a bowl with the yeast and sugar. Let sit until yeast is bubbling, about 10 minutes.
--Mix together remaining water, molasses, oil, salt, and cooked cereal. Stir in the proofed yeast, then add the all-purpose flour and two cups of the whole wheat. Stir with a spoon until a dough begins to form, adding more whole wheat flour to make a dough that holds together but is still a little sticky. Knead with your hands for 10-15 minutes, until the dough feels smooth.
--Place dough in a warm place (such as an oven with the oven light on, or in a sunny spot) and let rise at least one hour.
--Divide dough into two pieces and shape each into either a round boule, placed on an ungreased cookie sheet, or a rectangle, placed in a greased loaf pan. Let rise a second time, about 40 minutes.
Note: These rise times are very flexible. You'll want the dough to rise for at least one hour the first time and for at least fifteen minutes once shaped into loaves. Beyond that, let your availability dictate the process. You can swap the second rise for overnight refrigeration or let it sit for several hours during the first or second rise.
--Bake the bread at 375 degrees F for 40-55 minutes, until the bottom sounds hollow when tapped. If baked in a bread pan, et cool at least 15 minutes before removing from pan.

Sunday, October 19, 2014

Chocolate Bread

What a pretty loaf. While I think many breads are pretty (something about the spongy dough blooming into a sturdy baked boule just warms the heart), I'd say this chocolate bread rises to the top for its strikingly dark crust. I was hankering for a new dimension to knead into a whole wheat dough, having already explored some of the more common accompaniments—honey, ginger, oat. Enter cocoa: an unexpected addition that lends itself to both sweet and savory. A dash of cinnamon put the loaf under the umbrella of harvest foods, an area that lately seems to be dominating the grocery aisles and my household alike.

Be warned: this loaf is intense. Consider it the stout of breads, with a sweet aroma, dark bite, dense crumb, and spicy finish. In addition to providing a very deep, coffee-brown color, the cocoa powder delivers a hearty warmth of flavor that would equally well counterbalance peanut butter or mustard and a sharp cheese. I ate mine with squash sauce. One note to consider before slicing open the yeast packet: in addition to the rising time required (two to three hours total), you'll want to dedicate a good 10 to 20 minutes to kneading, depending on your level of patience. The longer you knead, the more chewy and satisfying the texture.
Adapted from Whole Baking Grain's Whole Wheat Chocolate Cinnamon Yeast Bread
Chocolate Bread

Ingredients:
2 1/2 cups water
1/2 TBSP apple cider vinegar
1 TBSP active dry or instant yeast
4 cups whole wheat flour, divided
1/4 cup olive oil
1/4 cup honey
1/4 cup unsweetened cocoa powder
1 TBSP cinnamon
1/2 tsp. salt

Directions
--Heat water to wrist-temperature. Add vinegar, yeast, and 2 1/2 cups flour and mix until combined. Let rest 30-40 minutes; you should start to see bubbles in the mixture.
--Mix together oil, honey, cocoa, cinnamon, and salt. Once yeast mixture is starting to bubble, stir in chocolate mixture. Add 1 1/2 cups flour gradually, beginning to knead once the mixture is firm enough to handle with your hands. Keep kneading for 10-20 minutes; the dough will be sticky, but firm enough to stay together in one mass.
--Cover bowl and let rise in a warm place until doubled, about an hour
--Oil two loaf pans. Separate dough into two balls; divide each into three pieces and use your hands to smooth the pieces into ropes. Braid dough ropes on a flat surface and transfer to the pans. Let rise until doubled again, about an hour and a half.
--Preheat oven to 350 degrees F. Bake for 30 minutes or until loaves sound hollow when tapped.

Monday, April 21, 2014

Hot Cross Buns

In the days of single-digit birthdays, my mother would grow a basket of wheatgrass at Eastertime. The pin straight blades slowly sprouted up toward the wicker handle, and if the grass grew too eagerly, we'd trim it with craft scissors. Day-of, she festooned the basket with ribbon and small ornaments—rabbits, eggs, chicks. I recall the basket as the ringleader of the holiday's fanfare, which we celebrated with new dresses, flower-trimmed straw hats, and eggs in jolly suits. As we aged, the decorative accouterments diminished in favor of a focus on food. It helped that I began helping with the meal prep—in recent years, we got as fancy as Eggs Florentine and mimosas. And if any Hot Cross Buns had survived into the weekend, we'd add them to the menu. The family's quite scattered now, so to honor a semblance of the Easter tradition, it's the food that I recreate. There's no green basket on the table, but there is a plateful of buoyant, faintly spicy hot cross buns.
 As it turns out, hot cross buns on Good Friday isn't quite as ubiquitous as I imagined. Of both my foodie and Easter-celebrating friends, few had stories to share about them—about crooked icing crosses, or uneven smatterings of raisins thrown into as-yet-unrisen dough. Eyes pass by the tightly packaged, squishy-sweet rolls in the supermarket bins without recognition. Of course, this recipe comes to you post-Good Friday, which makes any connection or lack there-of a bit moot. My recommendation, should you find the recipe appealing during the off-season, is to make the rolls and ice the entire tops (you'll end up with extra anyway). No one will be any the less for it.
Adapted from King Arthur Flour's Easy Hot Cross Buns
Hot Cross Buns
Ingredients for dough:
1 1/4 cups milk (I used skim)
1 package active dry yeast
1/4 cup brown sugar
2 large eggs
6 TBSP butter, softened
1 tsp. ground cinnamon
1/4 tsp. ground nutmeg
1 3/4 tsp. salt
1 TBSP baking powder
4 1/2 cups unbleached, all-purpose flour
1/2 cup raisins

Ingredients for icing:
1 cup powdered sugar
1/2 tsp. vanilla extract
3 TBSP milk, or a little more 

Directions:
--Heat milk until warm but not too hot to touch. Pour over yeast and 1 tsp. of the brown sugar. Let rest until proofed, about 10 minutes. 
--Mix together remaining sugar, butter, eggs, spices, salt, and baking powder. Add yeast mixture and stir to combine. Add flour all at once and mix until a cohesive dough begins to form. Use hands to form into a ball and knead until dough is smooth and elastic. Add raisins and knead to incorporate. Cover and let rise until doubled, about 1 hour.
--Divide dough into 12-14 golf-ball sized pieces. Shape into balls and set in a greased 8x8x8-inch baking pan (it's fine if they touch). Let rise another hour.*
--Preheat oven to 375 degrees F. Bake 20-25 minutes or until buns are deep brown. Let cool before decorating, to avoid having the icing spread and lose its cross shape.
--Make icing. Mix together sugar, vanilla, and milk until a smooth, spreadable icing forms. Once buns have cooled, use a knife to draw plus crosses on the buns. Serve warm if possible.

*Note: At this point, dough can be refrigerated up to 2 days. Let come to room temperature before baking.

Tuesday, April 1, 2014

Homemade Wheat Thin Crackers

There are some items which, unless you benefit from an unusual skill and assortment of resources, you'll have a tricky time making at home. Fancy cheese (or even homely cheese, really) falls into this category. I'd love to house-make cheese, but quite frankly the process is rather beyond me at this point. Therefore, when the nearby cheese shop posts a sale, that's where I go. There's also something very transporting about entering a cheese shop and seeing the creamy pale wedges lined up, slivers offered on butcher paper by a sharp attendant who possesses an uncanny knowledge about dairy products. I bought a beautiful wodge of brie. But it occurred to me that I could make crackers to go with them.

The particular recipe I've got here is quite a good take on the store-bought Wheat Thins. It's got the sweet bite from the whole wheat flour, tempered with a good dose of salt, and the texture has a slight give, unlike the straightforward crunch of your average saltine. I do have the advantage of possessing a pasta maker, which proved extremely handy in rolling out the crackers. A rolling pin also does the job quite well. They bake up in a snap and, from my experience, go very well with a good brie cheese.

From Smitten Kitchen's Homemade Wheat Thins
Homemade Wheat Thin Crackers

Ingredients:
1 1/4 cups whole wheat flour
1 1/2 TBSP granulated sugar
1/2 tsp. salt
4 TBSP butter 

Directions:
--Whisk together flour, sugar and salt. Add butter and mix with a fork until fully mixed in. Add 1/4 cup water and stir until a dough begins to form. Use hands to form into a cohesive dough.
--If you happen to have a pasta maker, you can run golf ball-sized pieces through the lasagna attachment. If using a rolling pin, divide the dough into two pieces before rolling out. Roll on a floured surface into a rectangle as thin as you can get it.
--Preheat oven to 400 degrees F. Cut crackers into 1-inch squares and use a spatula or wide knife to transfer to two large baking sheets (line with parchment if your sheets aren't nonstick). Leave some room between crackers. Bake 5-7 minutes, or until crackers are lightly browned and crisp to the touch.


Sunday, October 27, 2013

Crusty Whole Wheat Bread

This bread is an incarnation of the popular recipe for 'artisan bread anytime.' And by common standards, it is quite simple. Nearly every ingredient is a multiple of two. There's no need to heat the water or proof the yeast. Even the kneading's a short term deal. Chill the dough, and when you're ready to bake, it goes straight from fridge to oven. The steps are so straightfoward, there's barely an opportunity to make a mistake. As it turns out, however, I managed to find one method of messing up the recipe, and in doing so, made a rather unfortunate oversight.

I did not read the entirety of the recipe before commencing to bake this bread. The recipe itself I received word-of-mouth a month or so ago, and by the time I got around to testing it out, a few details escaped me. So I looked about the internet to fill in the gaps, and the blog I found suggested creating steam to achieve a true tooth-tugging crust. Sounded like a pretty good idea. But I skimmed over the recipe's crucial pointer not to use a glass pan for the steaming vessel. I popped this exact sort of pan into the oven while it preheated. Once up to temperature, I poured in some lukewarm water and in return heard a prompt pop as the pan shattered.
The oven is, at least, much cleaner now And after picking up the pieces and scrubbing both floor and oven innards, I made one dense, hefty, crusty loaf of whole wheat bread. I baked it on a plain cookie sheet, no frills, and a thick crust developed without any sort of steam bath at all. So what I'd like to present you with is an honestly easy recipe. It's a one-bowl affair, kneading can go for as little or long as you like, and after an overnight visit to the fridge, whatever shape you end up with can be plopped down onto a sheet pan and baked into an hearty boule that welcomes butter, cheese, peanut butter, or any combination thereof.
Crusty Whole Wheat Bread
Ingredients:
4 cups flour (any combination of all-purpose and whole wheat works: I used 1 1/2 cups unbleached, all-purpose flour and 2 1/2 cups whole wheat flour. A loaf used half of each)
1 1/4 tsp. yeast
2 cups water, room temperature
2 tsp. salt

Directions: 
--Mix together flours and yeast. Add water and salt, and stir with a spoon until a dough begins to form. Knead with your hands 10 minutes (or as long as you'd like, really).
--Put dough in a clean bowl, cover, and refrigerate overnight or up to 18 hours. When ready to bake, remove from the fridge while the oven preheats.
--Preheat oven to 450 degrees F. Form dough into an oval or round and set on a cookie sheet. Using a serrated knife, slash several 1/2-inch grooves onto its top.
--Bake for 35 minutes. Lower oven temperature to 350 degrees, and bake an additional 10 minutes, or until bread's bottom sounds hollow when tapped. Let cool at least 5 minutes before eating.

Tuesday, June 18, 2013

Three-Seed Flatbread


The poppy seeds will get stuck in your teeth. It's no use trying to hide this fact. If you've got good fortune, they'll keep to the back molars. If not, you may give your dining companions the awkward experience of choosing between informing you you've got seeds in your teeth or pretending they don't notice, leaving you to discover once everyone's gone that you've spent the entire night sporting a large seed front and center. Either way, you'll likely find the poppy seeds lingering beyond the last bite. But good grief, it is well worth it: for this is excellent bread.


Tuesday, April 30, 2013

Ginger & Honey Wheat Rolls

When fresh bread is in my kitchen, it is the sign of a slow weekend. It means I organized my day and got up at a decent hour. It means I've put on something comfy that can withstand a little flour. It means I have enough time to intermittently return to the house for pre- and post-rising duties. It means I've got the time to while away the morning with ears full of NPR and hands full of bread dough.

Should you have a similarly slow weekend (or weekday), I recommend giving these ginger and honey rolls a go. They add to my series of whole wheat yeast doughs, an area where the recipes have accidentally been stacking up. I started with some whole wheat oat bread, then made some pita, and now I've got these rolls. There was also some wheat pizza dough in there somewhere, but I ate it before it had a chance to reach the blog. So here we have rolls, spiked with honey and ginger. They're entirely whole wheat, so the kneading process is important and lengthyand also where NPR, or your preferred musical accompaniment, comes in. I also left the dough fairly wet. The honey makes it smoother, however, so the dough slides off the fingers quite easily as you knead.
The Yeast: Before and After
It is amazing what a bit of ginger does to this bread. These rolls just zing. The spice permeates each nook and cranny, lifting the deep wheat to a bright, tangy level. The other wonder about ginger is that it suits sweet and savory foods alike. This bread could make a mustard and cheese sandwich one day and peanut butter and jelly the next. The dough, I admit, is time demanding. It requires a long knead and two rises. Despite all this, however, it's fairly forgiving in terms of when you need to attend to it. The rising times are approximate, so the dough won't suffer if left a little long or cut a little short. I actually put my formed rolls in the fridge for a few hours, in lieu of giving them a shorter second rise. They emerged from the oven dense and delicious. You might make the dough earlier in the day and then pop them in the oven just prior to dinner time. Keeping them on a counter for a short second rise also works fine.
 
Adapted from Eat Cake for Dinner's Great Harvest Honey Whole Wheat Bread Copycat recipe
Ginger & Honey Wheat Rolls
Ingredients:
2 cups water
1 1/2 TBSP active dry yeast
1/3 cup honey
3 3/4 cups whole wheat flour
1 1/2 tsp. salt
1 TBSP ground ginger

Directions:
--Heat water in a medium pan until warm, but not scalding hot. Pour into a bowl over yeast and honey. Stir to dissolve honey, then let sit for 10 minutes until yeast has proofed.
--In a large bowl, combine flour, salt, and ginger. Add yeast mixture and stir with a spoon until dough begins to come together. Using floured hands, knead dough for at least 20 minutes, until the dough feels springy. Dough should remain fairly wet, but you can add more flour if it is impossibly sticky.
--After kneading, shape dough into a ball and let rise in a warm spot for 1 1/2 hours, or until doubled. Gently punch dough down.
--Grease or coat with cooking spray a 10 x 15 inch baking pan. Separate dough into golf ball-sized pieces. Roll into rough balls, flatten slightly by pressing between palms, and place on sheet. it's fine if the rolls touch each other. Here, you can let rise in a warm place for 30 minutes, or until doubled. Alternately, refrigerate for 2-5 hours. I did the latter for 5 hours.
--When dough has doubled, or after a few hours of refrigeration, preheat oven to 350 degrees F. If pan is in fridge, remove while the oven is heating up.
--Bake for 20 minutes. Rolls should sound hollow when tapped. Let cool for 1 hour before removing from the pan (this avoids the risk of tearing the rolls out and leaving the bottom half stuck to the pan).

Makes about 15 rolls.


Sunday, January 27, 2013

Pumpkin Bagels

I have never had a New York bagel. New Jersey bagels, yes. This past summer, we were driving home from our holiday on Martha's Vineyard, and we stopped at a New Jersey exit to fill the car with gas and ourselves with coffee. It was there that we spotted a sign for bagels. My family takes bagels very seriously, so we carefully nudged the car (sailboat in tow) into the tiny parking lot and all but bought the deli out. After a slightly stressful extraction of the car from the parking lot, just managing to avoid both parked and moving cars, we continued on our way. I ate my salt bagel whole and plain, and it was delicious.
This spoon knows bread better than anyone I know
So I haven't had a New York bagel, but I've had one from New Jersey, and from Brueggers, and from Dooley's. And possibly the tastiest Everything Bagel at Please & Thank You, although I'm not quite sure if they make theirs in house or not. But the bagels I've eaten most come from my mother's kitchen. My mother regularly makes bagels, and these too I often eat plain, or with a thick slice of sharp cheddar. Her go-to flavours are citrus-and-cranberry, or poppy and sesame seed. But over the holidays, I suggested we make pumpkin bagels, and she readily agreed.
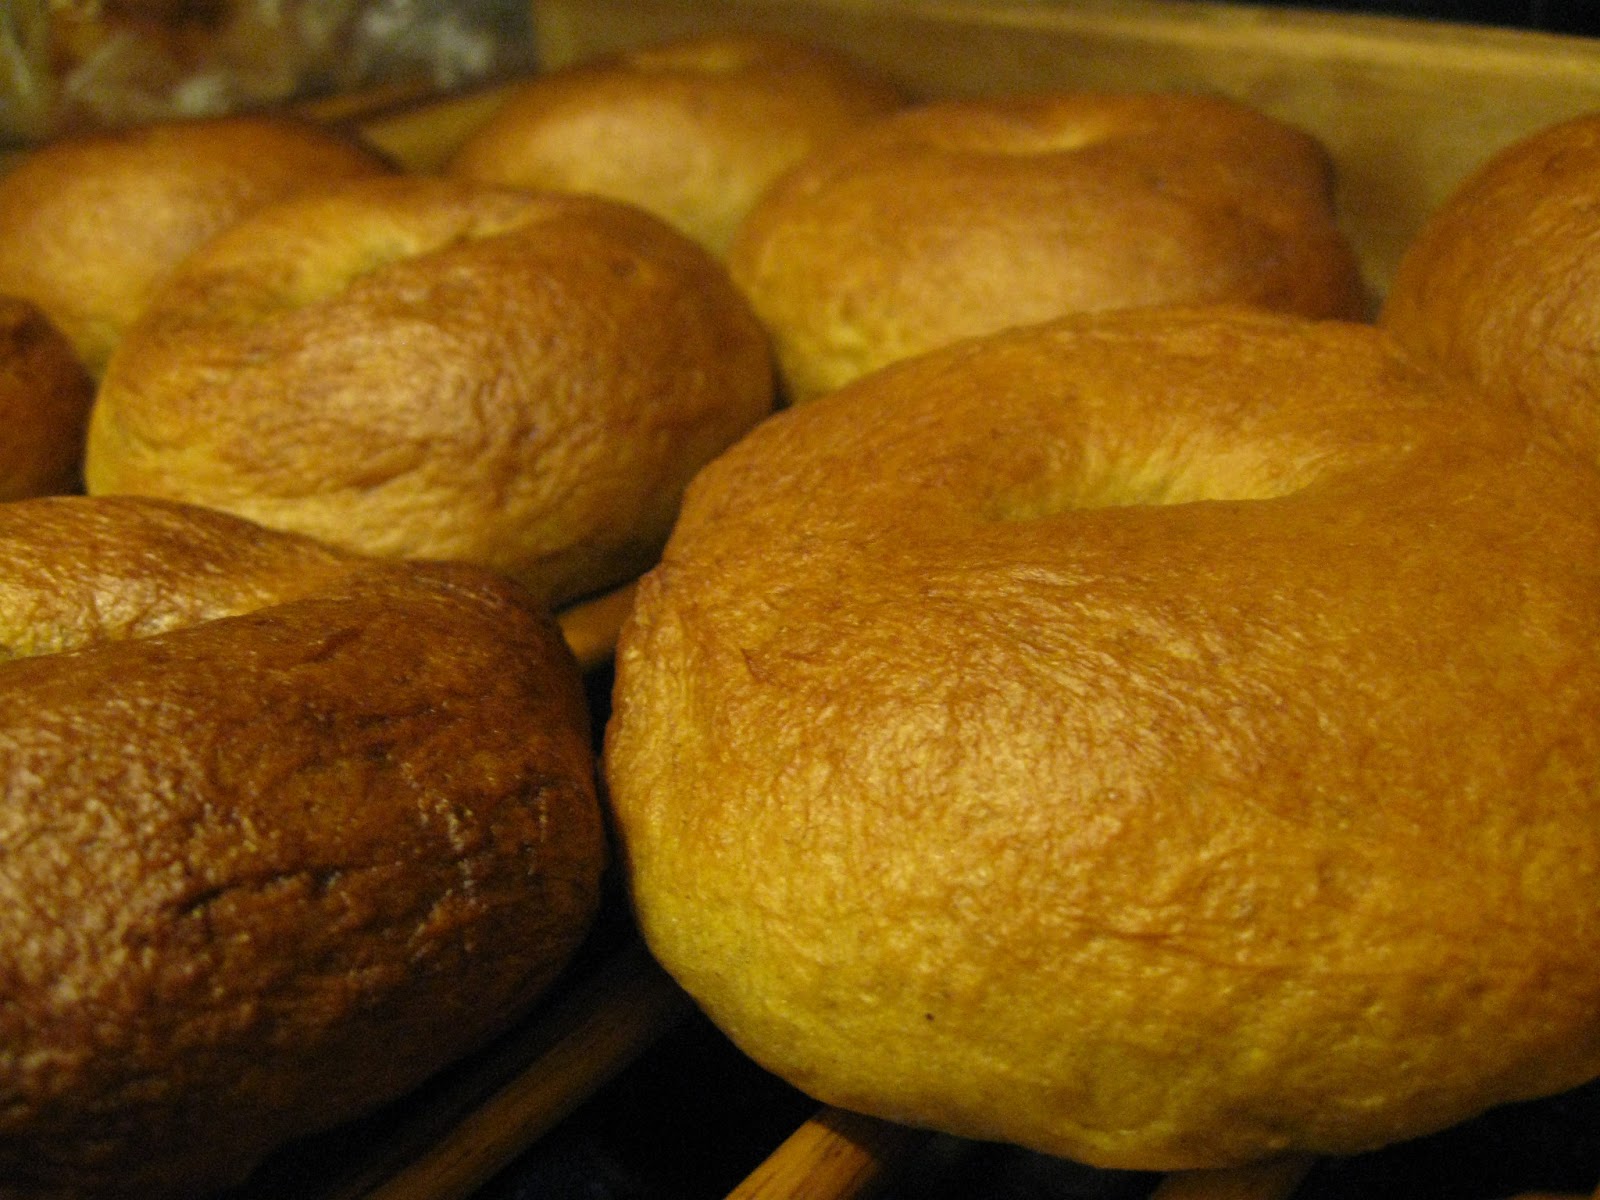
 These bagels were a complete collaboration, I peeking over my mom's shoulder as she boiled the bagels, the two of us poking holes into the plump, springy dough. The recipe is utterly hers; all I supplied was the suggestion to use leftover pumpkin. And it's a good recipe for two to tackle: one person to chase the bagels around the molasses-tinted water while the other finishes shaping the dough. I suppose, in other words, the recipe is a bit complex. But it's terrific for a low-key afternoon that invites you into the kitchen.
This recipe is my mother's classic bagel recipe; we just added pureed pumpkin and a bit of spice
or, rather, a few bits of spice. Cinnamon, allspice, ginger and cardamom. If you fancied, you could add or remove any flavouring you'd like. The result is a chewy, dense bagel that can lend itself to sweet or savory. The general consensus is that butter goes best, but the bagel really is your canvas.

Pumpkin Bagels
Ingredients:
2 1/2 cups water
1 package active dry yeast
1 TBSP molasses, honey, barley malt, or granulated sugar
1/2 cup gluten (optional: it does add extra chewiness, but the bagels will still be beautiful and tasty without it)
4 1/2 cups white bread flour or unbleached all-purpose flour
2 tsp. salt
1 cup pureed pumpkin, canned or homemade
1 tsp. cinnamon
1 tsp. ginger
1/2 tsp. allspice
1/2 tsp. cardamom

Directions:
--In a small saucepan, heat water to wrist temperature. Put yeast and molasses (or other sweetener) into a bowl and pour warm water over. Let sit until yeast is proofed, about ten minutes.
--Combine gluten, flour and salt in a large bowl. Add yeast mixture, pumpkin and spices. Stir with a wooden spoon until dough begins to form. Using hands, knead until smooth, adding more flour if necessary. Cover bowl with a towel and let rise in a warm place until doubled, 1 1/2-2 hours.
--Heat a large pot of water mixed with 1/3 cup molasses or barley malt to a boil. While water is heating, divide dough into 8-12 balls. Let rest 10 minutes, then shape into bagels by poking holes into the middle of the balls.
--Preheat oven to 425 degrees F. Add bagels to water 3-4 at a time and boil for 1 minute on each side, using a spatula to turn over. Transfer to a baking sheet lined with parchment. Bake for 35-40 minutes, or until bagels sound hollow when tapped. Remove from oven and let cool on a rack. Eating while warm is advised.

Tuesday, January 15, 2013

Olive Oil and Wheat Pita Bread

My mother has always grown her own sprouts, soaking the seeds in a bowl before laying them on a little trellis and letting them grow to fledgling sprouts in the fridge. I never liked sprouts and still don't, but I loved opening the fridge to see the small lawn of sproutlings. I would ask my mom if I could pick the portion for her lunch, as I delighted in pulling the collective tangle of roots out. My mother used them in a number of dishes; salads, open-faced sandwiches and, often, filling pita with hummus, avocado, cheese, and a handful of sprouts. My sister, brother and I would eat our pitas simultaneously, mine bare of any leaf, and then attack our individual heaps of blue corn chips.
I grew up on these and other pita sandwiches. Sometimes no one had sprouts, just shredded cheese, warmed in the oven until the edges got crisp. Sometimes they'd be fancier, filled with meatless meatballs and homemade marinara or falafal. And now, I find myself making the pita from scratch.A spur-of-the-moment decision, and nearly as easy to come together as the sandwiches we made.

 This recipe is incredibly easy. I give credit to the olive oil, an ingredient I do not in fact use that often. The few drops create luscious flavour, but also make the dough very easy to handle. A short rise followed by an even shorter one, and the dough is ready to bake. If you've got a baking stone, go ahead and put it on the rack as you warm up the oven. I did the same with an overturned cookie sheet, with great results.They're also fun to make- quite a few of mine rose into spherical pillows as they baked, appropriately deflating upon removal from the oven. Another trick- I used chopsticks to remove the baked pitas from the oven, as a spatula would have resulted in a chase across the cookie sheet surface, and the pitas were too hot to touch with bare fingers alone.

Adapted from The Fresh Loaf's pita bread
Olive Oil and Wheat Pita Bread
Ingredients:
1 1/4 cups cold water
1 tbsp granulated sugar or honey
1 package active dry yeast
1 cup whole wheat flour
2 cups unbleached all-purpose flour
1 1/2 tsp. salt
1 TBSP olive oil

Directions
--Heat water in a small saucepan until warm. Pour over yeast and sugar. Let sit until foamy, about 10 minutes.
--Combine flours and salt. Add yeast mixture and olive oil and stir with a wooden spoon until dough begins to come together. Using hands, knead dough into one mass. Keep kneading until dough is smooth, about 10 minutes, adding more flour if necessary.
--Let rise in a covered bowl until double, about one hour.
--Divide dough into 8-10 portions. Let balls of dough rest on a flat surface for about twenty minutes. Meanwhile, preheat oven to 400. Place a baking stone or overturned cookie or baking sheet in the oven while it heats up.
--Using a rolling pin or your hands, stretch portions of dough into rough rounds. Place on overturned sheet, as many as will fit (I fit three at a time). Bake for 5 minutes, or until dough is puffy and feels crisp to the touch. Using chopsticks or tongs, remove from oven and place on a plate to cool.
--Repeat with rest of dough. Eat immediately with smashed, roasted garlic, hummus, cheese, or plain. Pitas will also store up to a week, and can be frozen, with good results.

Saturday, November 3, 2012

Oatmeal-Honey Wheat Bread


Why do I love bread? Because it is, for me, the act of creating food from nothing. I need to go grocery shopping. I really do. I have oats, and peanut butter, and some frozen lasagna. I'm very weary of eating oatmeal, or uncooked oats with milk, or both of these things mixed with peanut butter. But for this pre-shopping evening, I've realized that I can make something new and warm. All I need is flour and yeast; and, in this case, some oatmeal and honey.
A dribble of honey
You'll notice I've decided to tackle wheat bread, something that previously led to tragedy and several unflavorful meals. This recipe calls for half white and half wheat, so it's not going full frontal on the wheat. I also kneaded it for quite a while (through half an episode of Downton Abbey), which made for the chewy, dense texture I love in my bread. The bread has highlights of sweetness from the honey; good for pairing with peanut butter, of course, but equally tasty with cheese and mustard.
Oatmeal-Honey Wheat Bread
Ingredients:
2 1/2 cups water, divided
1 cup non-instant oats, plus extra for topping
2 1/2 cups whole wheat flour
2 1/2 cups unbleached all-purpose flour
2 tsp. salt
1 1/2 TBSP yeast
1/2 cup honey, plus more for yeast
1 egg

Directions:
--Bring 2 cups water to a boil. Add oats and let soak, at least an hour and a half.
--Mix together flours and salt. In a small bowl, combine yeast and a squirt of honey. Heat 1/2 cup water until warm, and pour over yeast. Let sit ten minutes or until yeast is foamy.
--To flour mixture, add oatmeal, yeast mixture, 1/2 cup honey, and egg. Stir until dough begins to hold together. Knead with hands for at least ten minutes, but as long as you'd like (I kneaded for about half an hour; it's an excellent TV-watching activity).
--Let dough rise, covered and in a warm place, until doubled, or one hour.
--Lightly grease two loaf pans. Divide dough in half and form each half into an oblong shape by stretching and smoothing dough around itself. Place, seam side down, in pans. Let rise 1/2 hour, preheating oven after about 20 minutes.
--When dough has about ten minutes left to its second rise, preheat oven to 350 degrees F. Sprinkle tops of loaves with oats. Bake loaves 40-45 minutes, or until they sound hollow when tapped. Bread can be eaten immediately upon removal.

Tuesday, October 2, 2012

Garlic-Rosemary Foccacia and Apple Salad with Hazelnut-Crusted Goat Cheese


Right about this time of year, I start to really miss the bygone Harvest Party. Every fall, around the October moon, my family's group of Michigan friends would organize the party. It was a potluck, always held at the same household, a lovely futon-filled house with a sloping backyard we scattered with toothy carved pumpkins. We kids would play in the backyard while parents (I only now assume) drank wine and didn't pay attention to us.  And we would all eat. It was a chance for everyone to delight in the delicious skills of others, and to offer their own. Most of the kids have grown up (or are in the process of doing so), and have spread across the country, so the party is no longer. Its vestiges are manifested, for me, through an autumn hankering to be in the kitchen. With the leaves turning and the air crisping up, all I want to do is cook. My extreme affinity for fall flavors doesn't help either. Squash and apples--I just love the stuff.


Mushroom-ricotta lasagna

Brown Sugar-Apple Cake

So this weekend was rather a cook-o-rama for me. I spent my entire Saturday in the kitchen, going straight from cooking (and eating) brunch to making dinner. And then I baked a cake on Sunday. I'm happy to supply any recipe pictured. I'm just highlighting two here: a foccacia and spring-mix salad with crisp apples and warm goat cheese coated in hazelnuts.
The foccacia starts with the simple white bread loaf recipe, only it's flecked with rosemary leaves. I kneaded them in before the dough rose. You could sprinkle them on top, but I wanted each bite to impart the fragrant, woodsy flavour. Then I added a good dose of olive oil, sliced garlic and coarse salt before baking. It's straightforward and scrumptious.

Garlic-Rosemary Foccacia
Ingredients:
1 TBSP dried rosemary leaves, crushed or coarsely chopped (I crushed them by rubbing the dried leaves between my hands)
2 TBSP olive oil
2 cloves garlic, peeled and sliced
coarse salt

Directions:
--Make bread dough as directed. As you knead the dough smooth, add the rosemary. Continue with recipe, letting rise as normal.
--Heat oven to 425 degrees F. Lightly grease a 9x13 pan or cookie sheet. Pat dough down on pan. Using fingertips, press dimples into top of dough.
--Sprinkle olive oil, garlic and a few pinches of coarse salt over dough. Bake 20 minutes or until garlic is browned and foccacia feels hollow when tapped.


The salad is a really quick meal (and pairs nicely with the above foccacia). Sliced apples add an autumny note to a classic pepper-spring mix salad. The goat cheese receives a coating of chopped hazelnuts and is popped in the oven for a couple minutes, to become extra creamy and provide a contrast to the crunch of the nuts and apples.

Apple Salad with Hazelnut-Crusted Goat Cheese
Ingredients:
4 cups salad greens (I used a spring mix)
1 red bell pepper, sliced
2 tomatoes, chopped
2 apples, chopped into 1-inch squares
8-oz goat cheese, sliced into 9 rounds
1/4 cup hazelnuts, chopped
Dressing of your choice (I went for balsamic)

Directions:
--Mix greens, pepper, tomatoes and apples together in a large bowl. Add dressing and toss gently.
--Preheat oven to 350 degrees F. Line an 8x8 pan with parchment Place hazelnuts in a saucer. Gently roll sides of cheese in hazelnuts to form a coating. Place in pan. Repeat with 8 other rounds of cheese. Bake for 5 minutes, until cheese begins to soften and spread.
--Remove from oven. With a small spatula, place on top of salad greens.


Sunday, September 9, 2012

Classic White Bread Loaf

Last time I made bread, I went all whole-wheat, all the way. That recipe, you'll note, is not on this blog. Why not? I didn't knead it long enough. Impatience and whole wheat flour do not mix. I didn't take enough time to let the gluten develop, instead relying on a hapless hope that the bread would effortlessly become soft and chewy in the oven. This, it did not do. The bread fell to crumbs at the sight of a knife. It tasted heavy, not pleasantly dense. I ate it in large portions, just to clear the fridge for something better.
This time round, I thought I'd go the all-purpose flour route.

Things worked out much better. This bread is light, springy, but deeply flavorful. It has a satisfying, yeasty chew that just says bread. The ingredient list is very simple. But I dedicated about 20 full minutes to kneading the bread. It's a wonderful activity to do while listening to the radio. By the time I was finished, it was a smooth, silky ball of dough. It rose excellently in its spot on top of the cupboard. And out of the oven, the crumb held together really well. Cutting slices is a breeze.
The recipe makes one loaf, which keeps about 4 days at room temperature, and up to 10 days in the fridge. Excellent toasted with cream cheese, peanut butter, dipped in tomato sauce, et cetera. But I like a chunk fresh from the oven best. 

Adapted from Moosewood's Calzone dough recipe (yes, this is technically calzone dough in bread form. Why not, though, eh?)
Classic White Bread Loaf
Ingredients:
1 cup water
1 1/2 tsp. active dry yeast
1 TBSP honey or granulated sugar (I actually used agave syrup, as it was close at hand in the cupboard)
3 cups flour
1 1/2 tsp. salt

Directions
--Heat water until warm, but not too hot. Mix water, yeast and sweetener. Let sit for 10 minutes or until yeast is foamy.
--Stir together flour and salt. Add yeast mixture and stir with a wooden spoon until dough begins to form one piece. Knead with hands for 20 minutes, until the dough is smooth, adding more flour if necessary.
--Let sit in a bowl, covered, until doubled in size, about 1 hour.
--Preheat oven to 375 degrees F. Lightly grease a loaf pan. Form dough into an oblong shape by tucking folds into underside of dough ball. Place, seam side down, in pan. Let sit 15 minutes.
--Bake about 25 minutes, until top of dough is lightly browned and sounds hollow when tapped. Remove from oven, let sit at least 5 minutes before removing from pan and eating.