Showing posts with label Pastries. Show all posts

Monday, January 5, 2015

Brussels Sprout and Fennel Tart with Goat Cheese

This holiday break, my hostility toward fennel finally broke down. Previously, its similarity in flavor to anise seed left me pushing it aside in salads, ignoring fennel-focused recipes, and generally frowning when it appeared on menus. Then my sister took me to The Eagle in Over the Rhine, a Cincinnati neighborhood that really embodies the term 'happening.' The evening's highlight must be bestowed upon their spoon bread (A thick skillet pancake which appears to have maple syrup baked right in, delivering with each splendid forkful a sort of Goldilocks experience—not too sweet, not too dry, but Just Right). But we also ordered a salad of shaved fennel, arugula, and parmesan, and the fennel was just delicious: crisp, refreshing, and finely dressed with an acidic dressing. Perhaps, I thought between mouthfuls, there's something to my mother's affinity for the veggie.

With this experience fresh in my mind, I agreed to include fennel in a savory tart I was making for said mother's birthday dinner. It's showcased rather differently here: instead of being prepared raw, the fennel is sliced, coated in an herb-mustard dressing, and slow-roasted among mounds of earthy Brussels Sprouts. Turns out it was quite delicious this way too, layered over a landscape of creamy goat cheese, all snugged in a crisp pastry crust. I'm glad to know I needn't skirt the ingredient in the future. Although I'm even more glad to know that spoon bread exists. 

Sunday, August 3, 2014

Ricotta-Beet Tart (Gluten-Free)

For someone who likes to cook, there is little else as pleasing as a party of good eaters. And I've had the fortune to happen upon one such group, who not only enjoy a good multi course meal, but are game for just about anything I concoct, whether it's dainty, airy-fairy finger foods or a comforting pot of winter stew. Consider them my dinner club--we get together every so often (never often enough) for outrageously long meals, where the wine is passed around, plates are filled multiple times, and conversation winds from neighborhood happenings to the Star Trib's latest theater review. One of these eaters is also gluten-free, which challenges me to look for recipes beyond my normal repertoire of, well, bread and cake. And, luckily, I have a good friend who has recently embarked on the adventure of experimenting with non-wheat flours and supplies me with her favorite creations.

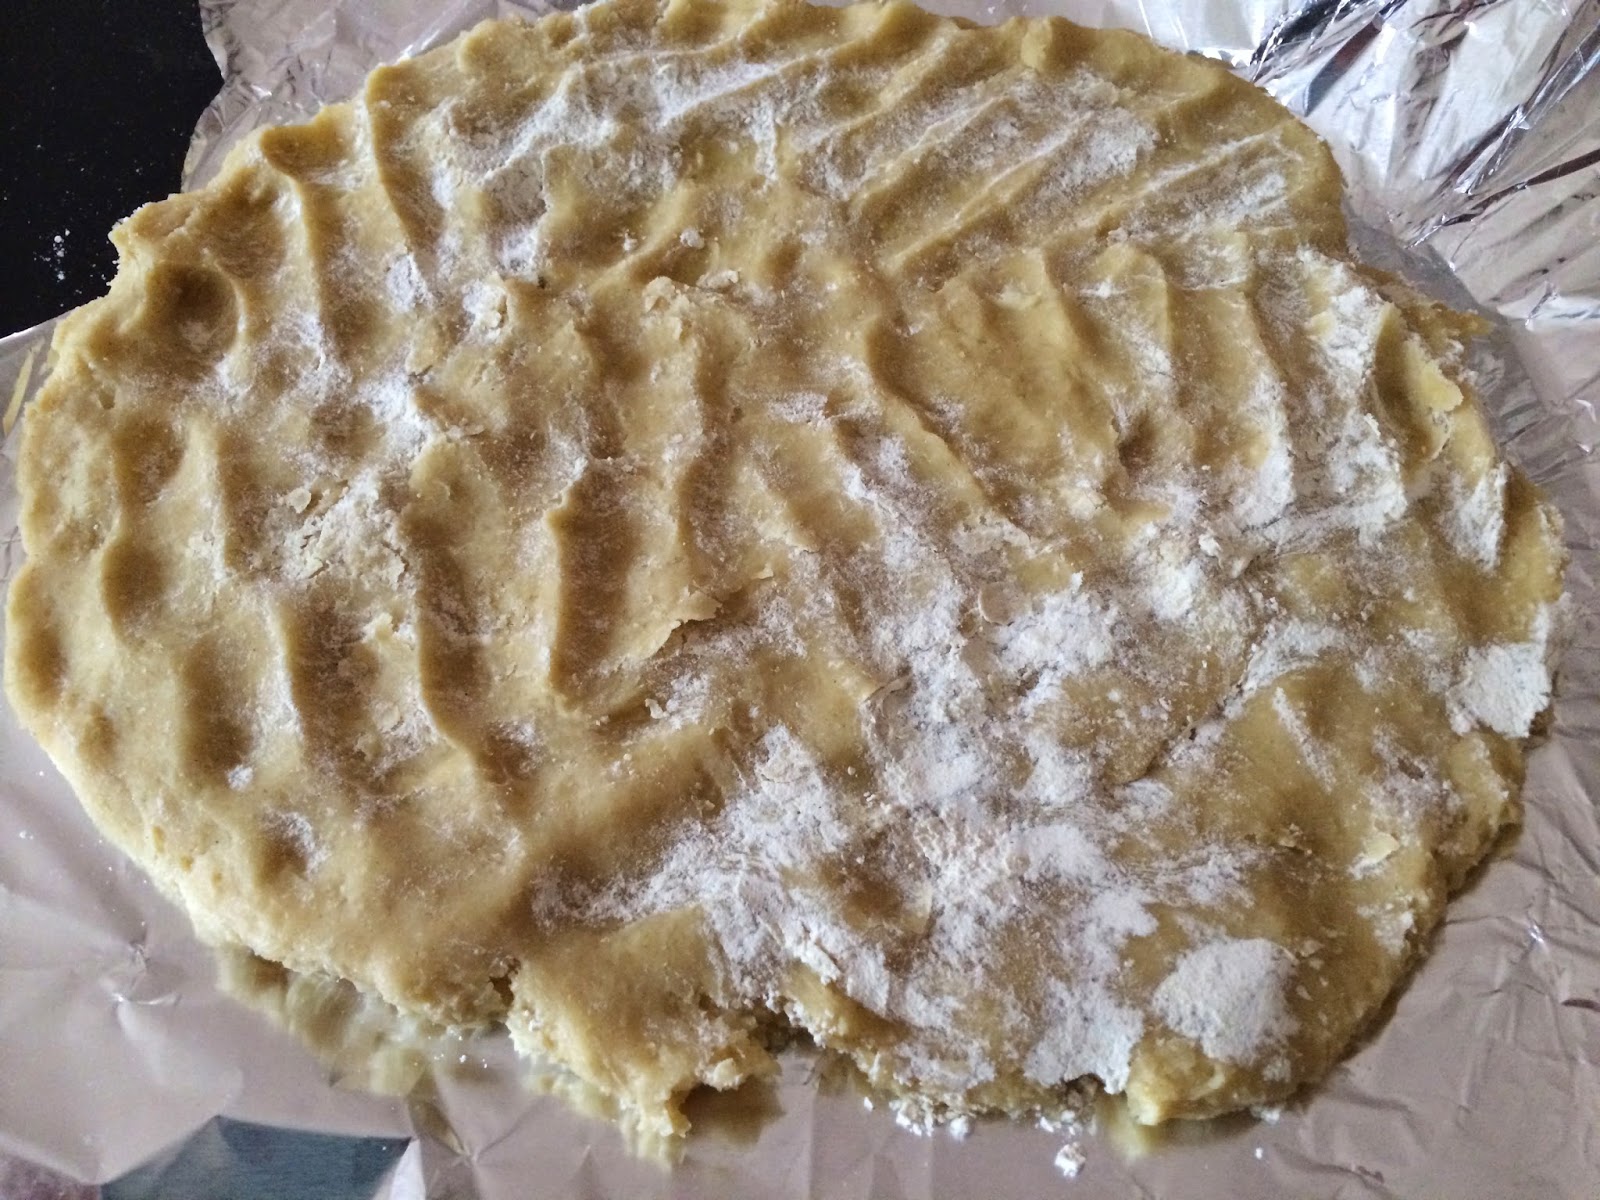
This recipe I served at our most recent get-together. It skirts ever so slightly around avoiding flour, as the crust is made with a gluten-free flour mix. But I was very taken by this tart, with its pretty spiral of ruby and gold beets and mound of ricotta, sharpened with feta crumbs and wild rosemary. The dough proved tricky to work with, as it was very sticky, but once flattened out (on some foil, to be safe) it baked up into a sturdy crust, texture reminiscent of a biscuit or scone. Slicing and serving was a cinch. 

I found the recipe through an amalgamation of old fashioned and mobile sources. It was recommended by my friend, who in turn found it in a cookbook by one of her favorite bloggers. As my friend and the cookbook reside in Michigan, she took a picture of the page and emailed it to me. And then I projected the recipe on my phone while I cooked. The recipe itself is similarly at odds with itself--the finished tart looks gloriously rustic, yet the crust required a trip to the now-stuffed shelf of alternative flours, a category which only recently showed up on grocery aisle signage. However you choose to recreate it, you'll have a bright, easy-to-eat offering for yourself, your dinner club, or your summer evening nosh.


Ricotta-Beet Tart (adapted from the Ricotta and Beet Galette with Teff Crust in Naturally Ella's cookbook)

Ingredients for crust*:
1 cup gluten-free all-purpose flour
1/2 tsp. salt
1 stick unsalted butter, cold
1 egg
1-2 TBSP ice water (I stick a cup of cold water in the freezer when I start to mix the crust. You could also just stick a couple ice cubes into a cup of water and use that immediately.)

Ingredients for filling:
4 beets (I used a mixture of golden and red)
1/2 tsp. salt
1 cup ricotta
1/4 cup crumbled feta
2 tsp. dried rosemary

Directions:
--Roast the beets. Preheat oven to 400 degrees F and oil a large baking pan. Peel beets and slice into 1/4-inch slices. Toss with salt and layer evenly in pan. Roast until a butter knife can slice through the beets, 40 to 50 minutes.
--Make crust. Mix flour and salt together. Cut butter into the flour, using two knives or your fingers. Once the butter is broken into pea-sized pieces, add egg and water. Stir until combined. Form in a ball and wrap in plastic wrap. Refrigerate for at least 30 minutes.
--Make filling. Mix together ricotta, feta, and rosemary. Refrigerate while you prepare the crust.
--Line a baking sheet with parchment or foil. Remove the pastry dough from the fridge and set on the parchment. Spread out into a dinner plate-sized oval (12 to 14 inches), covering hands with flour if it gets too sticky. Spread on ricotta mixture, leaving a 2-inch edge, and then layer the beets on top. Fold the edges of the crust over the filling.
--Bake 40 to 50 minutes, until crust feels firm. Let cool 20 minutes. Use the edges of the foil to transfer to a serving plate. Then carefully remove foil, using a spatula if necessary to lift up the tart so you can peel away the center bits.

*If you'd like to stick with a regular, full-wheat crust, I recommend this crust recipe. 


Sunday, December 8, 2013

Apple Tart


The primary delight of pie crust is its delectability. But another important boon is its wide range of uses. It might ensconce something sweet or savory, be shaped square or round, portioned out in individual tarts, or make one giant pie. However, in general these tasty destinations call for a crust dough that yields to the rolling pin without breaking, smearing into the parchment, or clinging to the pin. So for those days when the pie crust is feeling disagreeable, or you're feeling too impatient to coax it into a malleable material, we've got this recipe. A simple, toss-on-the-fruit tart. Don't throw away that cracking, oddly shaped hunk of dough. It's got all the ingredients for a delicious crust, and with this recipe you'll barely have to fuss with it.
I'd put this in the 'rustic dessert' category, where its imperfections are what makes it so appealing. Not unlike the open-faced galette, this tart's design forgives asymmetric sides or a less-than-rectanglular shape. It bakes up into a bubbling, warm dessert. The approximate braid on top just lets the spicy apples peak through, while a garnish of bright raspberries gives a slight zing to the homey flavors and heightens the tart's wild appearance.


Apple Pie Strudel
Ingredients:
for crust-
1 1/2 cups unbleached all-purpose flour
1/2 tsp. salt
1/2 cup vegetable oil
6 TBSP ice-cold water
for filling-
3 medium apples (I used braeburn, but any you like should do)
1/3 cup granulated sugar
2 tsp. cinnamon
juice from 1/2 lemon
optional: raspberries, for garnish

Directions:
--Make crust. Mix together flour and salt. Add oil and water all at once, mixing with a fork until the dough begins to come together. Use your hands to form the dough into a cohesive ball. Set aside.
--To make filling, thinly slice the apples, keeping the peel on. Add sugar, cinnamon, and lemon and toss to incorporate.
--Preheat oven to 340 degrees F. Between two sheets of parchment, roll out dough into a rectangle, approximately 10x15 inches. Score strips onto each side of the rectangle's longest side, like a fringe. Leave the middle third of the dough intact. Transfer to an ungreased baking sheet, carefully sliding the parchment out from under the dough (tear off the parchment piece by piece, if necessary).
--Layer apples onto the middle strip of the dough, overlapping slices so they all fit. Fold the dough strips over the top of the apples, alternating sides like a loose braid. Bake for 30 minutes, or until apples are bubbling and dough is lightly browned on top. Remove and let cool at least 30 minutes. If desired, garnish with raspberries.

Thursday, September 19, 2013

Spinach-Ricotta Phyllo Cups

I love planning menus. It involves pure possibility—and none of the worry, sharp knives, and faulty oven mits that cooking so often includes. I spent one summer planning and serving themed dinners for my family. But the lists, charts, and diagrams I devised to create these menus far surpassed the number of meals that I actually produced. Such was the case for a recent an end-of-the-summer party, where I was granted the task of planning and making a spread of finger foods. I went quite overboard with ideas, and the first round of menu planning produced a dozen or so two-bite dishes—considerably more than I could logically execute. So after some meditating, I took a cleaver to the list to identify the crowd-pleasers. These simple ricotta-spinach cups survived the edit.

Monday, September 9, 2013

Homemade Rhubarb-Raspberry Pop Tarts

    I do not recall ever eating a pop tart until my twelfth year or so and attended an overnight 4-H horse camp. The camp, as I remember it, involved a flurry of youngsters flexing their fledgling social skills, scrutinizing each others' fabric paint techniques, and alternately pulling their ponies around the arena or being pulled by their ponies around the arena. To fuel these taxing activities, the camp counselors (a mixture of dedicated 4-H leaders and volunteer parents, the latter likely perplexed to find themselves sleeping on hard concrete and herding 100-odd kids through the county fairgrounds) fed us an array of easy-to-mass-produce meals. And breakfast consisted of sugar-covered cereal, no soymilk in sight, and poptarts. The idea of eating a pastry covered by a swatch of bright blue frostingin the morning, no lessquite thrilled me.


But when I returned home, to soy milk and neutral-colored breakfast foods, I did not ask my parents to buy pop tarts. And they certainly did not ever offered it themselves. In fact I'm not sure they ever knew I'd tried one. And even now that I've reached a point where I can choose my own foodstuffs, I've never bought any.

All this is to say that, with no history of eating manufactured pop tarts, it is a bit unusual that I'd decide to make them from scratch. But all it took was the suggestion, from a pop-tart aficionado, that I give it a try. With a fairly empty weekend ahead of me, I thought I'd go for the challenge.


And it did turn out to be quite the challenge, primarily because the weekend was not only empty, but exceedingly humid. The very buttery pastry dough practically melted into the parchment as I rolled it out. The first batch produced a mess of scraping, patching, and gruff words. But for the second batch of dough, I returned the pastry to the fridge at intervals so the butter could firm back up between cutting and filling. This essential step made the entire process infinitely easier. And the yield was delicious. The filling stayed neatly within its flakey, rich casing, producing a pocket that crunched delightfully into the sweet and sour filling. The partially crushed raspberries created bursts of tartness amidst the smooth, sweetened rhubarb.   Do they resemble real pop tarts? I wouldn't quite equate them with the grocery-store pocket (es

Tuesday, March 12, 2013

Spice-Crusted Apple Handpies

The process of making these handpies this weekend proved satisfying in a few ways. I was, quite frankly, battling a small bout of end-of-weekend blues before I began baking. I had just bid farewell to some out-of-town friends. I could feel the temperature casually dropping. The mood, to say the least, was downcast. But an hour later, I found myself with a pie in hand, a house smelling of cinnamon, and a considerably more cheerful outlook. There's something about floury hands and freshly-skinned apples that brightens the day. I know I love baking. But it's comforting to know that it not only pleases the palate, but can overturn a gloomy mood as well.
    These pies are particularly delightful because they've got a double dose of spicy sugar. I simmered the apple pieces for about 10 minutes to soften the flesh and make for easier skinning. The fruit then received a quick toss in cinnamon sugar before being wrapped in the simple butter pastry. I pinched the crust edges together into a half-moon shape and dunked the whole pocket in the sandy mixture. The handpies emerged from the oven encrusted in golden sugar-spice. You could conceivably call these turnovers or pockets. But I just adore pies, so I'll attach the name to anything vaguely related to the pie family
Makes 4 mini-pies
Spice-Crusted Apple Handpies
Ingredients for crust:
1 1/2 cups unbleached all-purpose flour
1/2 tsp. baking soda
1 tsp. baking powder
1/2 tsp. salt
6 TBSP butter, cut into 1/2 inch chunks
6 TBSP cold water.

Ingredients for apple filling:
2 apples, chopped into rough pieces
1/3 cup granulated sugar
1 tsp. ground cinnamon

Extra granulated sugar and cinnamon for crust (I estimated, but I'd say 2 parts sugar to 1 part cinnamon)

Directions:
--Set a medium pot of water to boil. Once boiling, add apple chunks and reduce to a simmer. Cook 15 minutes, or until apples have softened, but aren't mushy. (Water should just cover tops of the apples). Once soft, remove the pan from heat and let apples cool. Use a knife to remove the apple skin. Toss apple chunks with cinnamon and sugar.
--While apples are cooking, make the crust. Whisk together dry ingredients. Add butter and water, and mix together with hands until dough stays together and forms a rough ball. Don't knead too much, or pastry will become tough; dough should just hold together enough to be able to stay in one piece when you stretch it out.
--Preheat oven to 350 degrees F. Flour a cutting board or flat work surface. Divide pastry dough into four pieces and, using a rolling pin our floured hands, stretch pieces into rounds, about 6 inches in diameter. Spoon 1/4 of the apple mixture onto one half of each crust. Wet the outer edges of the crust with water and fold other half over the apple filling, pinching ends to seal.
--Sprinkle cinnamon and sugar onto a plate or shallow bowl (no need to mix). Coat all sides of the handpies by placing on the plate and then turning them over. Place on an ungreased baking sheet and bake 25 minutes, or until crust is golden.


Wednesday, February 13, 2013

m&m Doughnuts (baked, not fried)

    I knew someone once who refused to eat the blue m&ms. The artificiality of the blue, apparently, outshone the dubiously more natural shades of green, yellow, and red. This was fine by me, as I would eat up the pool of blue m&ms they left at the bottom of the bag. As a child, I did wonder if any side effects might eventually show themselves, à la Violet Beaureguarde, perhaps. But I seem alright so far. And as is apparent, I unabashedly threw m&ms of every color into these doughnuts.
      Let me say right off the bat: I would not put these in the same category as fried doughnuts. They are their own foodstuff, closer to a sweet yeasted bun. Originally, I intended to make these for the office. I wanted to bake them the night before and bring them the next day. And I thought bringing crispless, day-old fried doughnuts would not quite cut it, so I sought out a baked recipe. As it turned out, I didn't quite get around to making them until the weekend. More for me I suppose! (The office got muffins instead.)
    My other reason for making these doughnuts stems from a preference for yeast-raised, rather than cake, doughnuts. This means that the preparation time is somewhat more involved than your average doughnut recipe, but it makes for a bite of dense, sweet dough, accented with crisp pieces of m&m chips. I began with a basic baked doughnut recipe, tweaking ingredients and steps to make a rather healthy, straightforward base. I then nipped this nutritious trend by kneading crushed m&m pieces into the dough.
These would be lovely with a chocolate or powdered sugar icing, but I left mine unglazed.They're also very good toasted and, if you've into a sweet-salty combination, with melted cheese. 
Adapted from Baking Me Hungry's Baked Raised Doughnuts

m&m Doughnuts, baked not fried

Ingredients:
1 cup milk (I used soy)
1 package or 1 TBSP active dry yeast
1/4 cup granulated sugar
2 1/2 cup unbleached, all-purpose flour
1/2 tsp. salt
2 tsp. vanilla extract
1 TBSP oil
1/3 cup m&m candies, crushed

Directions:
--Heat  milk to wrist temperature. Pour over yeast and sprinkle of sugar. Let sit until proofed, about ten minutes.
--Mix together rest of sugar, flour and salt. Add yeast mixture, vanilla and oil and stir until dough begins to form. Add m&ms and knead until dough is smooth, about ten minutes. Cover and let rise 2 hours or so.
--Flour a cutting board or flat surface. Divide dough into pieces that fit into your palm; mine made 14 mini doughnuts. Roll between your palms to make smooth balls of dough. Poke a hole into the center of the doughnuts. Let rise on floured surface while the oven heats.
--Preheat oven to 400 degrees F. Line two sheets with parchment paper or foil. Place doughnuts on sheets and cook ten minutes. Remove from oven; eat warm or toasted.


Thursday, January 10, 2013

Pumpkin-Raisin Cinnamon Rolls

There are some dishes for which I have one go-to recipe, one fail-safe method of producing something tasty. This bread loaf, for example, Moosewood's six minute chocolate cake, garlic-sauteed kale. Not so, however, with cinnamon rolls, my family's breakfast on Christmas morning. My mom and I make them regularly enough that we ought to have a reliable recipe, written down like so many others on a tattered 3 x 5 notecard and tucked into the tiny wooden chest of handwritten recipes that sits on the kitchen counter.


But we haven't got one. For years, we used a recipe from one of my mother's bread books. The dough filled two pans, one we left without nuts for those of us whose tastebuds hadn't yet matured enough to appreciate the crunch they contribute. This was a whole wheat recipe, yielding dense, yeasty rolls. They were good, but we craved the fluffy, spicy clouds we found at coffee shops and bakeries. Then King Arthur's Baking Book arrived in our kitchen, and we turned to its cinnamon roll and sticky bun recipes. That was a messy year. And as 2012 began to enter holiday baking season (that's October for me), my friend and fellow foodie emailed me a recipe for pumpkin cinnamon rolls. I kept it bookmarked until Christmas weekend and then got out the rolling pin.
Nothing wrong with a bit o' butter!
The pureed pumpkin adds subtle flavour and a lovely golden glow to the buns. We cooked up a pumpkin from scratch, although canned should work fine too. And we added extra spices in addition to cinnamon, which heightened the harvesty flavours I usually associate with pumpkin--ginger and allspice. But we still dumped on the cinnamon. And you should too. We also included raisins, which were particularly plump and dreamy after they soaked up some of the cream cheese glaze.
 Adapted from Smitten Kitchen's Pumpkin Cinnamon Rolls

Pumpkin-Raisin Cinnamon Rolls
Ingredients for dough:
6 tablespoons unsalted butter
1/2 cup milk, (cow or soy is fine)
1 package active dry yeast
3 1/2 cups unbleached all-purpose flour
1/4 cup light brown sugar
1/4 cup granulated sugar
1 tsp. salt
1 tsp. ground cinnamon
1/4 tsp. allspice
1/4 tsp. ground ginger
2/3 cups pumpkin puree, canned or homemade*

Ingredients for filling:
1/4 cup light brown sugar
2 TBSP granulated sugar
1 1/2 TBSP  ground cinnamon
1/3 cup raisins

Ingredients for cream cheese glaze:
4-oz. cream cheese, softened
2 TBSP milk
1 1/2 cups powdered sugar

Directions:
--Brown butter in a small saucepan. Heat butter over medium heat until melted; keep cooking until it turns golden and begins spitting, seven minutes or so. Once a few dark bits begin to gather at the saucepan's bottom, it should be ready. Remove from heat and let cool.
--In another saucepan, warm milk until lukewarm. Remove from heat and combine with yeast and a sprinkle of the sugar in a small bowl. Let sit until yeast is foamy, about ten minutes.
--Mix together flour, rest of sugars, salt and spices in a large bowl. Add 3 TBSP of the butter, the yeast mixture, and pumpkin and stir with a wooden spoon until rough dough begins to form. Use hands to knead dough until smooth, adding more flour if it is too sticky. Once the dough is smooth and feels springy, cover bowl with a towel and let rise until doubled in size, or about one hour.
--Flour a large flat surface or cutting board. Turn dough out onto surface. Using a floured rolling pin, roll dough into a rectangle, approximately 16x11 inches. Brush top of dough with reserved butter.
--Make filling. Mix together sugars and cinnamon. Sprinkle over buttered dough. Sprinkle on raisins, making sure they are distributed evenly. Starting with one long end, roll dough into a tight pinwheel.
--Using a length of dental floss, cut log into 1-inch rolls. Place cut rolls into a greased 9-inch round or square pan. Brush tops of rolls with any remaining butter. Cover and let rise for another 45 minutes or let refrigerate overnight.
--Preheat oven to 350 degrees F. Bake buns for 30 minutes. While rolls are in the oven, make the icing. Beat cream cheese with a fork until fluffy. Add milk and stir. Sift powdered sugar into the bowl and stir until glaze is well mixed.
--When tops of cinnamon rolls are golden, remove from oven. Let cool at least ten minutes before eating. We eat them right from the pan, and let each person add the amount of icing they desire.

* To make pumpkin puree from scratch, halve a small pie pumpkin. Using a spoon, scrape seeds and sinew from pumpkin. Place halves, cut sides down, on a baking sheet and bake in a 400 degree oven for 45 minutes, or until flesh is soft. Once cooled, remove flesh from skin and mash with a fork. A small pumpkin usually yields about 2 cups of mashed pumpkin.

Thursday, August 30, 2012

Glazed Peach Pies


Well, the Farmer's Market didn't have any peaches. Only vegetables. While a tomato and zucchini pie does sound rather good, I was looking for dessert materials, so I went to the Co-op and picked up a few white peaches. Each peach, it turns out, fits rather quite excellently into two muffin-sized pies They just need a bit of time in a pan with some sugar and cinnamon until soft. Then the crust gets glazed in the reduced peach syrup. And since they're mini, they take less time to cook, which means quicker onto the plate. 
I happened to have a batch of crust in my freezer, so notwithstanding the night of defrosting, I was saved the trouble and time of making pie dough. But I'm adding my preferred oil crust recipe here.You can do whatever you'd like with the crusts, of course. I essentially only know how to make these rustic leaf figures, so that's what I went for. But mini lattices would be awfully cute if you've got the time. Or just leave them open-faced and let the blush pink of the fruit stand on its own. What's truly wonderful is that the pies are hand-held. Easy to share, easy to eat.

Glazed Peach Pies
Ingredients for crust:
1 1/2 cups unbleached all-purpose flour
1 tsp salt
1/4 cup oil
6 TBSP chilled water
Ingredients for filling:
1/4 cup sugar
1/4 cup water
4 medium peaches, skinned and thinly sliced
Juice of 1 lemon
1 tsp cinnamon

Directions:
--Combine flour and salt. Add oil and 6 TBSP water together, mix just until combined. Using fingers, form dough into a ball.
--Mix sugar and 1/4 cup water in a saucepan. Heat over medium until sugar is dissolved. Add peaches and cinnamon and cook until peaches are soft and liquid has reduced but not evaporated, about 10 minutes. Add lemon juice and stir; remove from heat. Scoop peaches out of pan; pour leftover peach syrup into a small bowl.
--Preheat oven to 400 degrees F. Grease a regular sized muffin pan.
--On a floured surface, take approximately 1/9 of dough and roll into a small circle. Press dough into muffin pan. Fill with 1/4 cup peach mixture. Repeat with all but 1/9 of remaining dough to make 8 miniature pies.
--Using remaining dough, shape as desired and place on top of pies. Brush crust with peach syrup.
--Bake until peach juices are bubbling and crust is lightly browned, about 20 minutes.

Friday, August 24, 2012

Eggplant-Feta Turnovers in a Greek Yogurt Pastry Crust

I really adore baking hand-held pastries, from turnovers to mini-pies to cream puffs. And when I received an invitation to a potluck, I thought turnovers might be an appropriate offering, as an easily portable, not-so-messy dish. I always worry about finding the careful balance between original and overly-advernturous, particularly when making something for people I don't know, so I decided to make an eggplant-feta filling. Plus eggplant is fairly summery, and, well, it's a summery day. So I took the filling from these Eggplant-Phyllo cups in an Everyday Food mag. They look adorable; little purses of smooth eggplant and salty feta, spiced with coriander and all baked up in a muffin-tin. Despite the recipe's appeal in its original form, I really wanted to make turnovers, and didn't have phyllo anyway. So I found a cream cheese pastry dough recipe in my King Arthur Baking Book, substituted greek yogurt for the cream cheese, and made turnovers.

I made the pastry dough while th eggplant was roasting in the oven, letting it firm us per the directions in the fridge for a bit.The result was a lovely, pliable dough. Towards the end of shaping the turnovers the dough became a bit too pliable; I might keep half the dough in the fridge until you're ready to use it, to avoid it getting too soft. I didn't crimp the pastries in the end because it was so soft.


But they baked up very well without exploading, which was exciting; more often than not, my calzones, turnovers and other handheld pastries tend to fall apart in the oven. I ended up taking them to an outdoor potluck, and they held up very nicely in transit to Louisville's Waterfront Park.

Eggplant-Feta Turnovers with Greek-Yogurt Pastry Crust
Ingredients for pastry:

1/4 cup greek yogurt
8 TBSP (1 stick) butter, room temperature
1 tsp sugar
1/4 tsp salt
1 1/4 cups unbleached all-purpose flour, plus extra for cutting board

---Using a fork, mix together yogurt, butter, sugar and salt until smooth. Add flour and mix until a loose ball has formed; use your hands to bring the dough together. Shape into a ball and place in the fridge (either in the bowl or wrapped in plastic) for thirty minutes.


Ingredients for filling:

1 large eggplant, halved lengthwise
olive oil
salt and pepper
1/2 cup crumbled feta cheese
1/2 tsp ground coriander
2 TBSP dried basil

---Preheat oven to 400 degrees F. Lightly brush cut sides of eggplant with oil and sprinkle with salt and pepper. Place eggplant, cut side down, on a rimmed baking sheet. Bake until tender, 20 minutes, then remove from oven and reduce heat to 375 degrees F. When cool enough to handle, scrape flesh from skin and roughly chop. Transfer to medium bowl and mix together with feta, coriander and basil. Season with salt and pepper to taste.


To Assemble:

---Lightly grease or line with parchment one baking sheet. Remove dough from fridge and separate into eight pieces of equal size. Using hands or a rolling pin, shape dough into a square on a floured cutting board.

---Scoop 2 TBSP-worth of filling onto corner of pastry. Fold pastry in half, over filling, and press edges together to seal. Place on baking sheet. Repeat with seven other pieces of dough.

---Bake 30 minutes or until pastry is light golden brown. Transfer to rack to cool.